happy 3rd anniversay <3

To my wonderful husband: 

Cheers to the past three years of marriage, to 6-1/2 amazing years together, and to infinity more. We’ve created wonderful memories, laughed way too hard, and shared countless X’s and O’s. My life couldn’t be more perfect, but everyday that I spend with you – it is. I love you! 

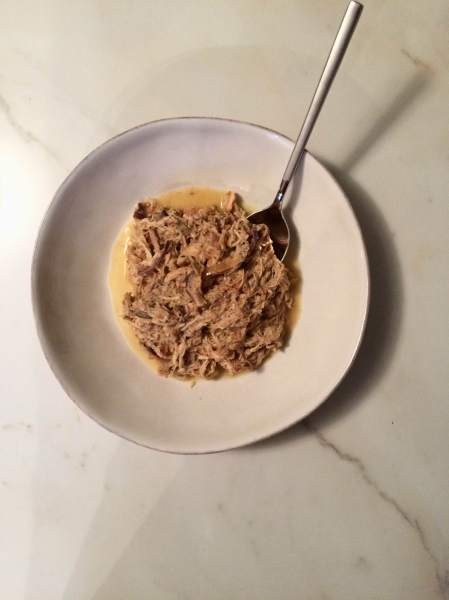
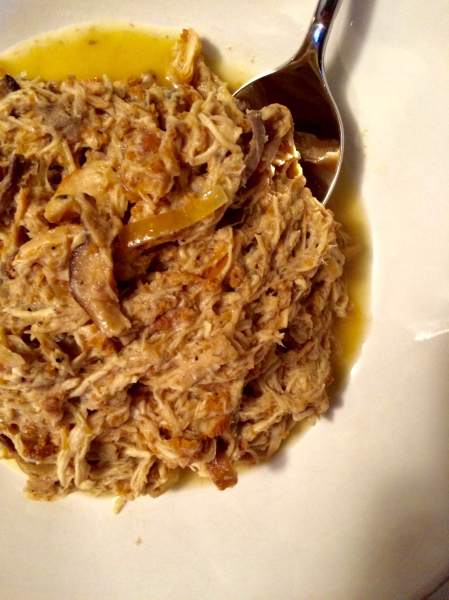
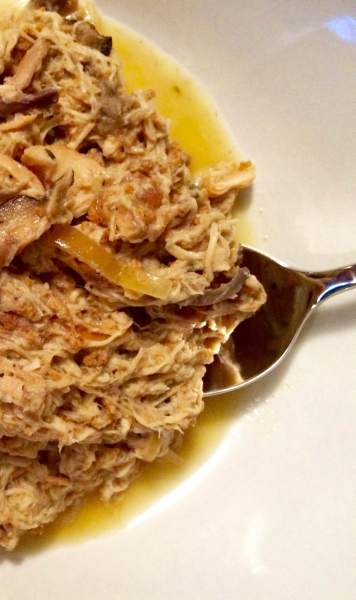
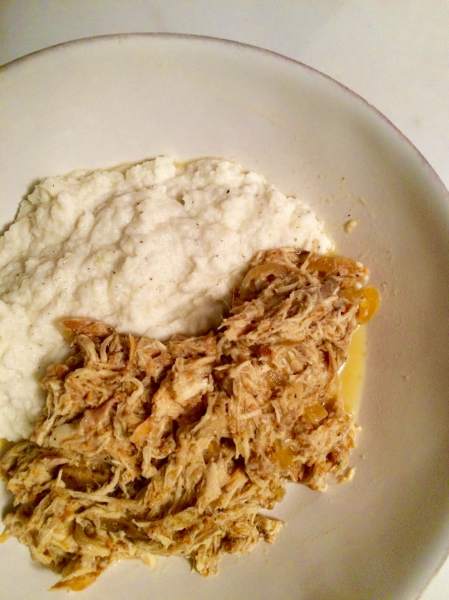
chicken and mushroom gravy: crockpot edition

Time to dust off the crockpot, y’all. It’s the most wonderful time of year!

…crockpot season, that is! While this beloved appliance of mine makes celebrity appearances during the summer {for dishes such as this and this}, it truly shines during the cooler months. There’s something so special about a slow cooked meal, and walking into your home at the end of a dreary day, greeted by aromas wafting from the kitchen. It is instantly soothing, like a hug or a pat on the back with someone saying – “don’t worry, dinner is on me tonight”.

Except we prepared ahead! This dish couldn’t be easier. For awhile now, I’ve been craving a mushroom gravy. I didn’t know with what, though; I spent a few nights last week brainstorming dinner ideas, and when I stumbled upon this recipe, I knew it would be perfect. I tweaked it a bit to fit the current state of our refrigerator, and voila! A perfect chicken dinner, prepared in no time.

IMG_8477

IMG_8478

I spent the day at work {and the hubs too, I’m sure!} dreaming about this dish. Like I mentioned, I love the anticipation of the end of the day, knowing that dinner is doing work on itself. And y’all, it was amazing. From the moment I walked in until we sat down for our meal, there was nothing but smiles. The chicken is perfectly tender; the gravy is rich and flavorful. And piled high on top of your favorite starch, it’s a match made in chicken heaven.

IMG_8480

Enjoy!

~~~

Chicken & Mushroom Gravy: crockpot edition {recipe adapted from food.com}

Wonderfully comforting and delicious, this dish is the ideal fall meal. With minimal prep time, it can be thrown together minutes before walking out the door for work; you and your family will be rewarded with the glorious aroma of roasted chicken and gravy after a long day! 

Ingredients:

3 lbs. bone-in, skin-on chicken breast

8 ounces plain Greek yogurt

4 cups low-sodium chicken stock, divided

1 tsp. oregano

1 tsp. rosemary

1 tsp. onion powder

1 tsp. garlic powder

salt and pepper, to taste

1 large onion, thinly sliced

8 ounces sliced fresh mushrooms {I used shiitake}

2 Tbsp. cornstarch + 1/2 cup boiling water, combined {to be used at the final 15 minutes of the dish}

1 Tbsp. butter

To Prepare:

After removing the skin, generously season both sides of the chicken breasts with salt and pepper. Place into the crockpot, and top with the sliced mushrooms and onions.

In a small mixing bowl, whisk together the Greek yogurt, 2 cups of the chicken stock, and herbs. Season to taste with salt and pepper. Pour over the chicken and vegetables.

Cook on low for 6-7 hours, or until chicken is done and falling off the bone. At 15-20 minutes before serving, uncover the crockpot and shred the chicken and stirring well with the gravy mixture. Remove any bones you see! Pour in the remaining 2 cups of chicken stock, and add in the slurry {cornstarch and hot water}, making sure to combine thoroughly. Lastly, stir in the butter.

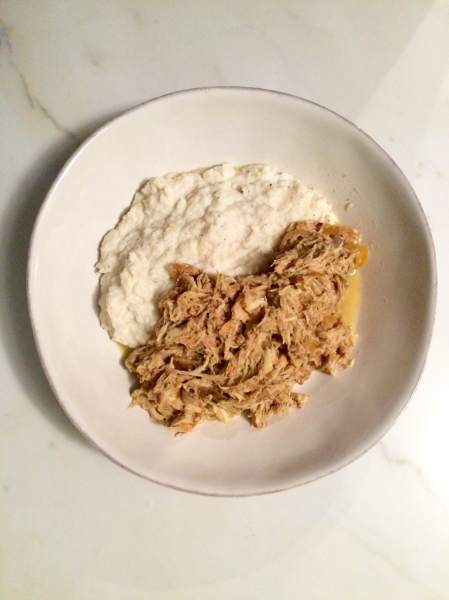
Serve over rice, egg noodles, or my favorite – – – smashed cauliflower.

IMG_8482

IMG_8481

Enjoy!

thirsty thursday: mojito margaritas

Autumn, where did you go??

As I sit here typing this, it’s currently 75 degrees and sunny. Let me repeat myself – SEVENTY FIVE DEGREES. Ugh.

Here we are, almost into October…and I’m sharing a margarita recipe. Is this blasphemous? Well, strike that; it’s always margarita time, but I feel that since we’re solidly into fall now, I should be sharing fiery, soul-warming drinks {especially after this post}, but here I am, tempting you with a summery cocktail.

Not that you’ll be complaining after you make this drink. It’s easily a new favorite of ours, even considering that this drink is more adept for spring and summertime sipping. It combines two of my favorite drinks: a fresh, minty mojito with a tart and tangy margarita.

sidenote: how many times do y’all think I can say “margarita” in one post? 

It’s bright and sweet, but not overly so. Ideal for sipping after a long day at work, or kicking off the weekend. There’s plenty room for adjustment with this drink {an extra splash of tequila here, maybe some fresh muddled fruit added in}, and goes down so smoothly, you’ll wonder what happened!

This recipe can easily be doubled or tripled….just to avoid the sin of an empty glass during happy hour.

IMG_8210

~~~

Mojito Margaritas {recipe adapted, minimally, from How Sweet It Is}

The combination of these two classic cocktails makes for one perfect, flavorful drink. One sip, and you’ll see why. 

Ingredients:

coarse salt + sugar for the rim
lime wedges
a bunch of fresh mint for garnish
2 1/2 ounces simple syrup {I tend to err on the lower side, as I prefer a drink that is hardly sweetened}
1 1/2 ounces tequila {I prefer silver}
1 ounces Grand Marnier
1 ounce rum
3 ounces lime juice
2 ounce club soda

To Prepare:

Take a chilled glass and rub the rim with a lime wedge. Dip the rim in a mixture of coarse salt and sugar, covering it as much as you can.

In the bottom of the glass, add 1 ounce of simple syrup and a handful of mint leaves. Muddle with a muddler or use the clean bottom of something blunt.

Add ice to the glass, and pour in the tequila, Grand Marnier, rum, lime juice and remaining simple syrup. Mix with a long spoon or knife, stirring well to combine. Add another bunch of mint leaves and a lime wedge or two. Top the glass off with club soda {a few ounces until you reach the top!}.

IMG_8204

IMG_8213

Cheers!

catching up over coffee

Good morning, friends. I thought today that maybe we could catch up over a bit of coffee…chat a little bit, and see how everyone is doing?

Because the first thing that I have to say is…

WHEW.

I’d be lying if I said that the past weeks months haven’t been a whirlwind. I’m sure you’ve noticed as well, from the overabundance of my “lately” posts that have been popping up over here. Don’t get me wrong; I’m certainly not complaining! It’s been a lovely, fun and wonderful summer but…I’m ready for things to SLOW.DOWN.

&&

in about 6 weeks, the hubs and I will get just that! Doesn’t that sound crazy?! Shoot, even just saying that we still have that much left on our calendar is a tad mind-blowing. Two weddings. Anniversary celebration. Trips out of town. Visitors in town. It’s quite the life we lead, eh?

But before I continue my barrage of words on schedules and trips, let me ask – what do you have coming up? Any fall weddings on your agenda? What about birthday celebrations, or family gatherings? OR! {and I’ll be quite jealous if your answer is ‘yes’} do you have any football travelling planned? The hubs and I are big fans {both college and NFL} and love that we get to spend parts of the week soaking up all the glory that is football. It is, quite simply, awesome. < 3

Lest you think I neglect the topic, let me assure you that I haven’t slowed down on my home cooking! Yes, it’s taken a bit of a backseat lately, which is why there has been a slight lessening of recipes here. I’m raising my hand and admitting that I’ve fallen back into scheduling our easy weekly meals; ones that I can cook basically with my eyes closed, and one hand tied behind my back. Still delicious and soul-warming, but not so exciting that I would deem them worthy of sharing. I have a list about 100 recipes deep that I am yearning to whip up, but just waiting for the right time {aka a more manageable calendar – ha!}. I miss cooking and sharing with you all! Nothing makes me happier than doing just that; and trust me, if I could figure out a way to pass food through the computer screen for y’all to try, you betcha I would be all over that.

What tasty dishes and treats have you whipped up lately? Are you just basking in the glory that is fall weather? This is my favorite time of year. Not only does it signify that our wedding anniversary is just around the corner, but I adore all things fall – cozy clothes, crackling fires, and the FOOD. Oh yes…soups and stews, casseroles, hearty grains, and the reappearance of my beloved crockpot. It makes my heart sing, all of this.

I’m so glad we got to sit down and catch up! In typical Alicia fashion, I have to run – another busy day ahead. Let me know how you’re doing too, I’d love to hear from you!

xoxo

lately: winery hopping

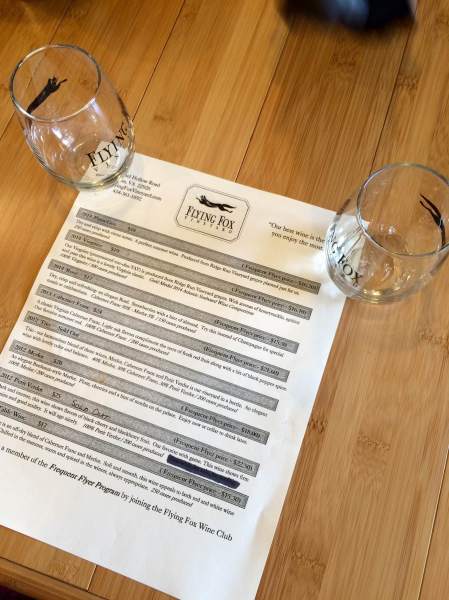
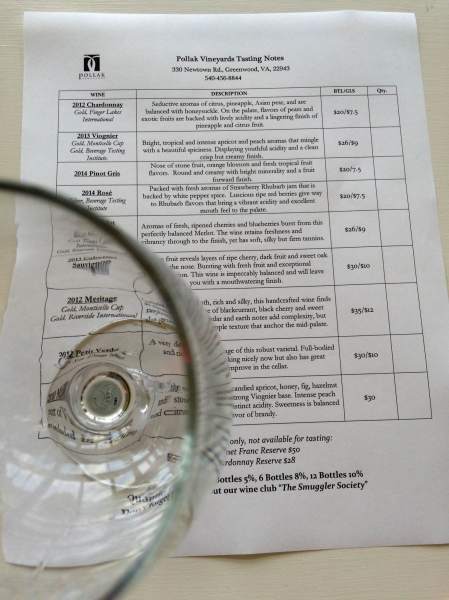
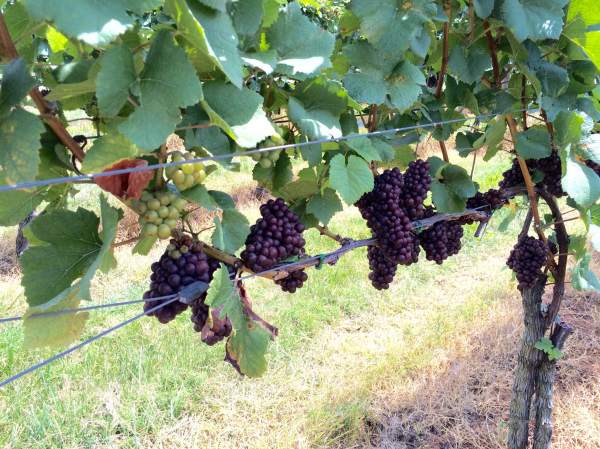
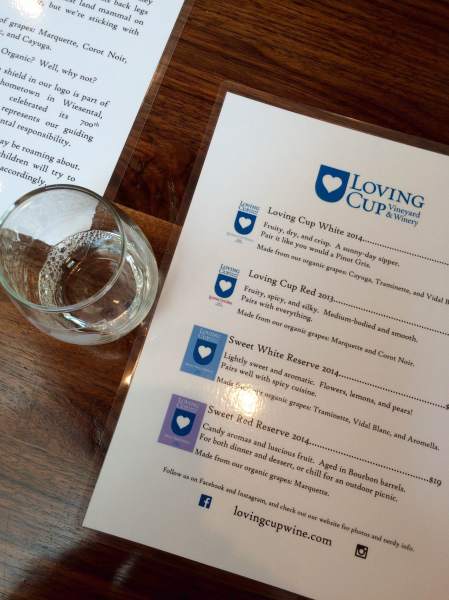
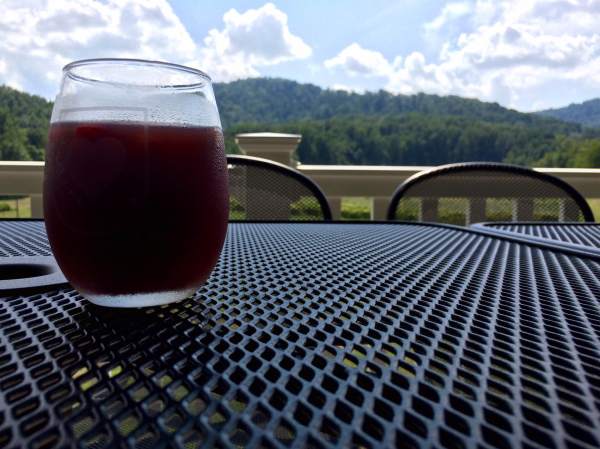
Because the hubs and I just cannot get enough of exploring local wineries and breweries, we took advantage of a free weekend last month and made our way up to Charlottesville, VA. Being only a mere 2 hours {and that’s a bit of a stretch!} from our home, it is the ideal weekend getaway – a Saturday afternoon spent exploring venues we’ve not yet been to, dinner down at ‘The Corner’, and a little bit of bar exploring before calling it a night! And, you know us, we couldn’t leave enough alone…we made sure to squeeze in a hike on the way home Sunday morning! Here’s a peak into the places we visited, many of them recommended by my dear friend {and wine connoisseur} Suzanne : ) 

Enjoy! -Alicia xoxo 

Saturday Afternoon: Hopping 

{Bold Rock Cidery, Fly Fox Vineyard, Blue Mountain Brewery, Pollack Vineyard, Loving Cup Vineyard, Albermarle CiderWorks}

IMG_1003 IMG_1008 IMG_1009 IMG_1010 IMG_1011 IMG_1017 IMG_1016

IMG_1015

IMG_1014

IMG_1019 IMG_1025 IMG_1020 IMG_1028 IMG_1032 IMG_1031 IMG_1030 IMG_1037

IMG_1035 IMG_1038 IMG_1039 IMG_1042 IMG_1041 IMG_1047 IMG_1045

Saturday Night: Out and About {Mellow Mushroom, Basil}

IMG_1055 IMG_1049

Sunday Hike: Humpback Rocks, Appalachian Trail

IMG_1056

IMG_1057 IMG_1058 IMG_1063

Sunday Afternoon: {Barren Ridge Vineyard, Rockbridge Vineyard}

IMG_1068 IMG_1069 IMG_1070 IMG_1072

thirsty thursday: crafting the perfect beer flight

We’re talking beer today, y’all! And being a typical lady {and lover of all things autumn}, I thought – why not share some ideas for creating the ideal beer flight? After all, the start of September means ALL.THINGS.PUMPKIN.

Image result for pumpkin

I was doing my weekly grocery shop a few days ago and couldn’t help but notice all of the fall seasonal beers beginning to make their appearance on the shelves. From local brews, to popular craft breweries, and all the way up the chain to the national/international names that everyone knows, it seems that everyone is dedicating a vast majority of their brews to seasonal fall beverages. I am certainly not complaining, but the choices can be a little lot overwhelming! So naturally, I’ve brought in the hubs as my “professional” consultant on today’s post, and together we’re sharing how to kick off autumn with the perfect seasonal beer flight!

Question: What makes pumpkin beer so special? 

Answer: There is only a small window during the harvest year where pumpkin is accessible. You should NEVER use canned pumpkin puree – there is a substantial amount of flavor {and appreciation!} that comes with roasting fresh pumpkin for using in brewing. It’s also a great way to carry that pumpkin flavor out, and stretch it over a few months.

~~~~~

Question: What are the main differences in the kinds of offerings? Shouldn’t they all taste the same if they’re all technically “pumpkin” beers?

Answer: That’s like saying “all chocolate cakes are the same!”. In all seriousness; the foundation of the beer, that is the pumpkin, is the same…but that is where the similarities end. Each brewer, whether on a large or small scale, has crafted their own recipes to suit their flavor profiles and taste preferences. Many on today’s market rely heavily on traditional pumpkin pie spices – this gives them a much sweeter taste than say, one that is brewed with roasted pumpkin and fewer ingredients. For a true experience, you want to ensure that your pick is made with 100% pure roasted pumpkin, and flavored according to your taste buds. Be on the lookout for labels that say only “pumpkin flavor” or “pumpkin pie spiced”, as these typically do not include fresh pumpkin in their batch.

~~~~~

Question: How many varieties of beers {ales, IPAs, etc.} can we expect to see in our local stores?

Answer: The most common would be a pumpkin ale. Other ones worth looking out for {but may be harder to find} include: shandies, lagers, stouts, porters, and wheat beers. Truth be told, any type of beer can be crafted into a pumpkin beer – the style of the brew is what will make the biggest difference. My best advice is to pick a style that you like, and go from there!

~~~~~

Question: What are some of your top suggestions?

Answer: In no particular order…Dogfish Head Punkin Ale, Schlafly Pumpkin Ale, Southern Tier Pumpking, Blue Moon Harvest Pumpkin Ale, and New Belgium Pumpkick.

~~~~~

And now….taking all this information and building it into your beer flight!

According to the hubs, here are some good things to keep in mind…

“Pour all four {or however many beers you’ve selected!} into separate glasses. At this point, order doesn’t matter – we are looking mainly for color and heaviness. Because we’re talking pumpkin beers today, the heaviness will all be pretty similar; so we’ll next look at the ABV {alcohol by volume}. **sidenote: if we were doing a more traditional flight, you would start with a lighter beer {like a lager}, then move on to ales and darker beers**  From this point, you’ll line up your beers from lightest color and lowest ABV, and gradually move up to darker colors and higher ABVs. Just like in any beer flight, you want to progress towards your strongest-flavored beer, so that the flavors build on each other as you go. Make sure to take an initial sip between glasses, before your second {longer} sip, so that you can clear your palette for each flavor. 

…and if all else fails, just drink them in the order where you finish with your favorite!”

Happy beer drinking, friends!

cookies n’ cream cake

Oreo lovers, you’ve found your ::literal:: slice of heaven.

IMG_8031

We all know pretty well by now that I have a sweet tooth the size of the planet, but it’s not too often that I do a lot of baking. Don’t get me wrong, I love baking! – it’s a methodical, precise process; entirely different from the way most of my day-to-day cooking goes. But the art of baking requires concentration and focus; sometimes I need that in the kitchen. Which is why I always let the hubs choose as intricate a birthday dessert as he wants. It’s a win for the both of us – he gets an awesome dessert, and I get my focus fix {and yes, the entirety of the dessert is consumed solely by the two of us!}.

This year’s cake was a no brainer. I mentioned above that Oreo cookie lovers have found a slice of heaven. I kid you not, this cake is hands-down the embodiment of an Oreo cookie, crafted into a glorious 2-layer cake. Every inch, every crumb of this cake pays homage to the iconic cookie. We have crumbled Oreo wafers in the actual cake base. The creme filling finds its way into the frosting that is sandwiched between the two cakes. Whole Oreos have been pulverized into a fine powder, and folded into the buttercream frosting.

One  might think that such a cake will be cloyingly sweet. But I promise that it’s not! I tweaked the original recipe just a bit; eliminating a bit of the sugar, presenting alternate options for the oil and sour cream ingredients. It is a perfectly balanced dessert; sure, it’s indulgent, but worth every delicious bite.

 Have I described it well enough? Are you running to the kitchen to make this?

IMG_8012 IMG_8013 IMG_8017

Because you very well should be : )

~~~

Oreo Cookies n’ Cream Cake {recipe adapted from Sally’s Baking Addiction

Oreo lovers will fall head over heels in love with this decadent creation. Full to bursting with both Oreo cookie crumbs and the oh-so-loved creme filling, it hits all the right notes. Finished with a fluffy buttercream frosting, this cake is sure to win a spot in your hearts – not to mention, bring back fond childhood memories of dunking Oreo cookies into a tall glass of milk! 

Ingredients: Chocolate Layer Cake

3/4 cup unsweetened cocoa powder {not dutch process}

1 cup granulated sugar

1-1/2 cups cake flour*

1 tsp. baking soda

1/4 tsp. salt

2 large eggs, room temperature

1/4 cup applesauce {you can also use vegetable or canola oil}

1 cup full fat sour cream or full fat Greek yogurt, room temperature

2 tsp. vanilla extract

1/2 cup hot coffee or hot water

3/4 cup  Oreo cookie crumbs**

*if you don’t have cake flour, simply remove 3 Tbsp. of the all-purpose flour, the add in 3 Tbsp. of cornstarch. Sift the all-purpose flour and the cornstarch together before using

**scrape out the filling before pulsing the cookies, and set to the side for later use

Ingredients: Oreo Cream Filling

6 Tbsp. unsalted butter, softened to room temperature

reserved Oreo creme filling {from the 3/4 cup of Oreo cookie crumbs}

2-1/2 cups confectioners’ sugar

2 Tbsp. milk or cream

2 tsp. vanilla extract

Ingredients: Vanilla Buttercream

3/4 cup unsalted butter, softened to room temperature

1 tsp. vanilla extract

4-1/2 cups confectioners’ sugar

1/4 cup milk or cream

10 additional Oreo cookies, pulsed into a fine crumb

To Prepare:

Position oven rack in the center of the oven. Preheat to 350 degrees. Generously spray two 9″ cake pans with nonstick spray, and set aside.

In a large bowl, using a handheld or standing mixer fitted with the paddle attachment, blend the cocoa powder, sugar, cake flour, baking soda, and salt together on low speed for 30 seconds. Add in the eggs, applesauce {or oil of choice}, sour cream {or Greek yogurt}, and vanilla. Mix on low speed for one minute.

Remove the bowl from the mixer and add the coffee and Oreo cookie crumbs; stir to combine. Some of the chocolate chips will melt as you stir. Avoid overmixing the batter!

Pour the batter into the prepared cake pans. Bake for 28-32 minutes, or until a toothpick inserted in the center of the cakes come out clean. Allow cakes to cool completely on a wire rack.

While the cakes cool, make the Oreo Cream Filling. 

In a large bowl, using a handheld or standing mixer fitting with the paddle attachment, cream the butter, shortening {or just all butter}, and reserved Oreo creme filling on high speed until light and fluffy. Add the confectioners’ sugar, 1 cup at a time, alternating with the milk/cream and vanilla. The filling will be thick, but you may add more milk/cream if you prefer. Set aside, tightly covered, in the refrigerator.

While the cakes cool, make the Vanilla Buttercream. 

In a large bowl, using a handheld or standing mixer fitted with the paddle attachment, cream the butter on high speed until fluffy, about 1 minute. Beat in the vanilla on low speed, then add in the confectioners’ sugar 1 cup at a time, alternating with the milk/cream. The buttercream will be thick. Using a rubber spatula, gently fold in the Oreo cookie crumbs. Set aside, tightly covered, in the refrigerator.

Once the cake is cooled, assemble the cake.

Place one cooled layer on a cake stand or large plate. Using an offset spatula or knife, cover the top with a 1″ thick layer of the Oreo Creme Filling. Top with the second cake. Cover the tall layer cake with the Vanilla Buttercream.

Slice and serve! Leftover cake can be covered and stored in the refrigerator for up to 3 days.

make ahead tip: the cake layers can be baked, cooled, and covered tightly at room temperature overnight. The frosting and filling can be prepared, then covered and refrigerated overnight. Assemble and frost the next day, when you are ready to serve. 

IMG_8033

that was the size of one slice <3

lately: labor day weekend fun!

Another Labor Day weekend for the books! The hubs and I spent a fun weekend at home, full of activities – both indoors and out! We spent Saturday afternoon enjoying some wine at our favorite local winery, followed by dinner and cocktails out in the downtown area. Sunday was spent outside! – a great, new-to-us 7 mile hike, followed by a wine tasting nearby. The evening was spent out on the back porch; grilling, fire pitting, and roasting marshmallows! Monday was full of FOOTBALL – go hokies! Even though the outcome of the game wasn’t what we were hoping for, it was a fabulous day with fun and friends. Hope that y’all enjoyed yours! Here’s some snapshots of our adventures : ) 

Alicia xo 

IMG_1230 IMG_1225 IMG_1224 IMG_1223 IMG_1222 IMG_1221

 IMG_8253

IMG_8243

IMG_8237

IMG_8232 IMG_8234 IMG_8240 IMG_8249 IMG_8255

IMG_7960

healthy ranch dressing

When preparing a salad, it deserves nothing but the best. Fresh, wholesome ingredients that a full of flavor. Toppings that complement the salad itself, but don’t weigh it down. And of course, there’s the dressing – for many, a necessary component. And more often than not, it’s what takes a salad from fresh, healthy and fabulous to a total calorie bomb. Why waste all that wonderful nutrition and flavor, just to be topped with something that essentially eradicates all the goodness you’ve prepared?

That’s where this salad dressing comes to play. In college, I did my fair share of overdressing my “healthy” salads with many a preportioned dressing – seemingly so innocent in its neat little package, but erasing all the healthfulness of my dinner with each satisfying squeeze of said packet. I do wish that I could go back and tell my previous self “NO!!” but alas, it’s a lesson learned. These days, I look for flavor in other ways – tangy mustard, olive oil and {lots!!} of fresh lemon juice, and today’s recipe…ranch dressing.

image c/o hcuforu.com

image c/o hcuforu.com

Yes! It’s true! Ranch dressing can be healthy, and delicious all at the same time! After stumbling upon this recipe, I tentatively tried it {you see, I was not a big fan of cottage cheese for some time, but that’s another store for another day} and both the hubs and I immediately fell head over heels for it. The texture is perfect, it’s bursting with flavor from the fresh ingredients and herbs, perfectly tangy from the buttermilk. A total win. And the bonus? – you get a pretty hefty dose of protein from the cottage cheese itself! Your salad won’t be complete without this on top from now on, trust me on this.

~~~

Healthy Ranch Dressing {recipe adapted from Eating Well}

By making a sneaky {and healthy!} swap into one of the most beloved salad dressings, the classic Ranch gets a face lift! Cottage cheese, when pureed into a silky texture, makes the ideal replacement and base for a healthy salad dressing. The addition of fresh ingredients and plenty of herbs result in a salad topper sure to please anyone! 

…and why stop there!? Use this condiment for dipping baked French fries, drizzled into sandwiches and wraps – the possibilities are endless!

Ingredients:

1 small shallot, peeled

3/4 cup nonfat cottage cheese

1/4 cup reduced-fat mayonnaise {I like to use the olive oil/mayonnaise combination, available at most stores}

2 Tbsp. white wine vinegar

1/4 cup buttermilk*

1 Tbsp. fresh dill, chopped

salt and pepper, to taste

*the amount may vary, depending on how thin or thick you prefer your dressing; simply adjust as desired

To Prepare:

With the food processor running, add shallot through the feed tube and process until finely chopped. Add in the cottage cheese, mayonnaise and vinegar. Process until smooth, scraping down the sides as necessary, about 3 minutes. Pour in the buttermilk while the processor is running. Scrape down the sides again; add in the dill, salt and pepper. Process until combined.

make ahead tip: cover and refrigerate for up to one week. 

philly mac n’ cheese

From a culinary standpoint, birthday celebrations are a big deal in our house. I look forward to them every year {more so the hub’s birthday than my own} because not only are they are good reason to pull out a good bottle of wine, but because we tend to go over the top in terms of dinner.

IMG_8020

We celebrated the hub’s birthday not long ago, and we spent quite some time trying to figure out what kind of meal to prepare. Every year, I let him decide on exactly what it is he wants. No limits, no rules – his dinner wish {and dessert!} is my command. It’s pretty much a win-win for both of us; he gets a meal of his own creation, and I get to have fun whipping it up in the kitchen!

When he settled on the more traditional mac n’ cheese, I asked him to come up with some sort of twist on it, sort of a way to spice it up a bit. We bounced ideas back and forth…flavor combinations, dishes that he likes, we we somehow steered the conversation to sandwiches.

“What about a philly?”  I asked him. His eyes lit up, and I knew we had found the dish of the year. The end result? – a combination of a few staple dishes in my repertoire, with some funky additions that make it perfect for him. It’s an indulgent dish, and you bet that we will be bringing this out again once the cooler autumn months come around.

IMG_8009 IMG_8007 IMG_8003

Enjoy!

~~~

Philly Mac n’ Cheese {recipe adapted from Williams-Sonoma}

Definitely one of the more creative birthday dishes we’ve dreamed up over the past few years, this mac n’ cheese hits all the notes of a classic cheese steak sandwich: perfectly loaded with cheese, traditional vegetable add-ons, and of course…oh-so indulgent. 

Ingredients:

1/2 lb. dried pasta, such as cavatappi

non-stick cooking spray

2 Tbsp. unsalted butter

3 Tbsp. cornstarch

1 cup milk of choice

1/2 cup low-sodium chicken stock

3/4 cup freshly shredded Gruyere cheese

3/4 cup freshly shredded champagne cheddar cheese {if not available, feel free to swap out with extra sharp cheddar}

1 package frozen spinach {cooked, drained, and cooled}

2 cups baby portabella mushrooms

2 cups chicken {cooked, cooled, and shredded}

1/8 cup freshly grated Parmesan cheese

1/8 cup Panko {Japanese bread crumbs}

olive oil, for sauteeing the mushrooms

salt and freshly cracked black pepper, to taste

To Prepare:

Preheat the oven to 375 degrees. Spray an 8″ x 8″ glass baking dish with nonstick cooking spray, and set aside.

Bring a large saucepan of salted water to a boil over high heat. Add the pasta and cook, stirring occasionally, until not quite al dente, about 2 minutes less than the package instructions. Drain and transfer to a large bowl, and set aside.

In a small nonstick skillet, cook the mushrooms with a splash of olive oil until lightly sauteed, about 5-7 minutes. Season to taste with salt and pepper, and set aside.

Return the saucepan to medium-high heat and melt he butter. Add the cornstarch and cook, stirring well, until the cornstarch is thoroughly incorporated, about 1 to 3 minutes. Whisk in the milk, chicken stock, and an generous pinch of salt; bring to a boil. Simmer, whisking frequently to smooth out any lumps, for 4 to 5 minutes. Remove from heat, and add a pinch of pepper and stir to incorporate. Slowly add in both the Gruyere and champagne cheddar cheese, making to sure combine thoroughly.

Pour the cheese sauce over the pasta and stir well. Next, fold in the spinach, mushrooms, and chicken. Transfer to the prepared baking dish and top with the Parmesan and Panko. Bake until the top is lightly browned and the sauce is bubbly, about 25-30 minutes. Let stand for 5 minutes before serving.

Serve with a side of roasted vegetables {we opted for asparagus!}.

 IMG_8026

IMG_8024