whole wheat pita bread

This is my kind of sandwich bread.

pitabread2

Perfectly thin, crisp yet boasting a soft interior. Pita bread is the ideal sandwich vehicle, because let’s be real – you can stuff it with everything that you love, no mess or drips to worry about!

One of my girlfriends makes some of the best homemade pita that I’ve yet to experience, and after having them at one of our many get-togethers, I was finally inspired to try my own version at home. The process was made super simple because of my handy bread machine {y’all know how much I love this piece of kitchen equipment!}. Just a few quick ingredients, basic ones, actually, are added into the well and left to let the machine work its kneading and rising magic. The real beauty is what happens AFTER the machine has worked on it; a quick bit of handwork, rolling it out, followed by a quick secondary rise to ensure maximum puffiness while baking. The end result?…

Hands down the most gorgeous, fluffy pita I’ve ever seen! The hubs could not get over how much they ballooned while baking. I was pleasantly surprised myself : ) we’ve used this for everything – sandwiches, pita pizza, chips…the variety of uses is endless – and love them so much that they have become a freezer staple for quick meals!

I’m thinking that some dressed up variations {think: herbed pita, cheese infused, etc.} will be making an appearance sooner rather than later…I mean, how could that be a bad thing?!

~~~

Whole Wheat Pita Bread {adapted, minimally, from The Bread Machine Cookbook}

Makes 10 pita 

Ingredients:

1-1/3 cups water

3 Tbsp. olive oil

1 Tbsp. honey

2 cups bread flour

1-1/2 cups whole wheat flour

1 tsp. salt

1 heaping Tbsp. vital wheat gluten {optional, but encouraged}

2 tsp. yeast

To Prepare:

In the order mentioned above, add all ingredients into the well of your bread machine. For the yeast, I make a small hole in the center of the flour and add it in last, covering it slightly with flour once put in. Set the program to ‘dough cycle’ and let the machine work as programmed.

Once the dough has completed the cycle, divide the dough into 10 pieces and roll into balls.

Preheat oven to 500 degrees. Lightly dust two large baking sheets with cornmeal. Set aside.

Flatten each ball into a disk, and roll into a circle of about 6″. Place onto the prepared baking sheets, and let rise for about 20 minutes, covered loosely with a kitchen towel in a warm place.

Bake for 8-10 minutes, or until the pita have puffed and the bottoms are golden brown.

Pita will keep at room temperature, tightly sealed, for 2-3 days. After that, place in the freezer and let thaw before using.

fresh italian loaves

Homemade bread absolutely delights me. There’s something so special about the act of rolling out dough, letting it rise, and watching it bake and become beautiful in your oven. The aroma isn’t so bad, either.

IMG_5901

IMG_5897

Perhaps it also means so much to me because growing up, my mom was constantly making homemade bread. As I’ve mentioned before, we grew up with a bread maker in our kitchen, one that saw so much action, I think that we went through two or three {at least} before I up and went to college.

It was one of my first “big” purchases as an adult, for my very own kitchen. I wanted to carry on that tradition that my mom started – homemade doughs and rolls, fresh loaves so tall you have to slightly tear off the top from the machine. It definitely holds a special place in my heart, and one I can’t wait to share with my children someday. For now, the hubs and I delight in constant bread rotation.

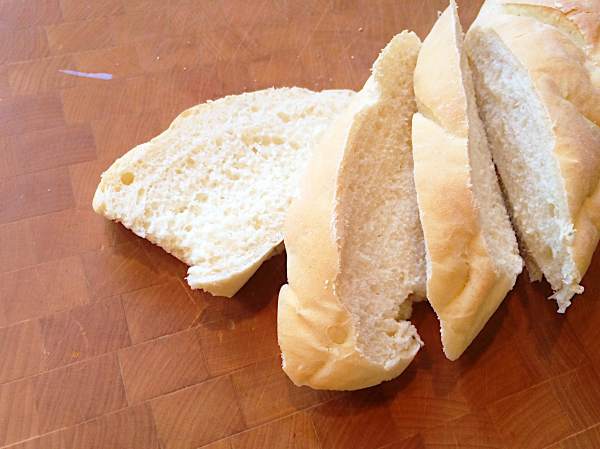
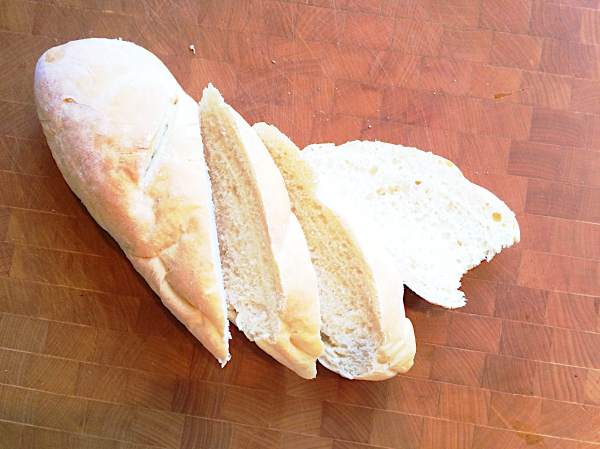
The recipe today is one that is practically a staple in our kitchen; if there’s not one in the bread box, there’s a loaf in the freezer, yearning to be thawed and toasted for the next meal. These Italian loaves are so, so simple; a few simple ingredients come together to form a bread that is so light and airy on the inside, but perfectly golden and crisp on the outside, it’s impossible to resist…especially out of the oven. We especially love it served warm, with some herbed olive oil on the side for dipping. It makes wonderful sandwiches; can be transformed into croutons for breakfast casseroles and bread puddings or, if you’re like us…you dig right in when it’s hot out of the oven.

IMG_5902

~~~

Fresh Italian Loaves {yields two large loaves}

Perfectly simple to prepare; all ingredients process together in the bread machine. A simple roll and rise is all it takes for fresh bread to be produced from your oven in no time! I’ll note here that you can also find great success using half whole wheat flour; the results will be nuttier and a bit heartier, perfect for pairing with rich soups and stews.

Ingredients:

1-1/2 cups water

1 tsp. honey

3/4 tsp. kosher salt

3-1/2 cups bread flour

2-1/2 tsp. yeast

1 heaping tbsp. vital wheat gluten, optional

To Prepare:

Add the ingredients into your bread machine according to the manufacturer’s instructions. The dough cycle on mine lasts about an hour and fifty minutes, with the option to add additional time if I’m going to be running in and out of the house, doing errands, etc. Don’t feel the need to check on the dough as it processes! – the heat will be lost and you run the chance of compromising the integrity of the dough.

As the cycle comes to a close, prepare your baking sheet by sprinkling it with cornmeal. This results in a crisp bottom; feel free to use as much {or as little} as you’d like.

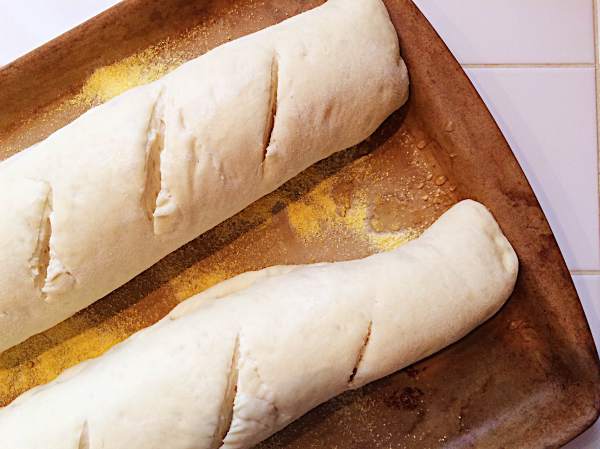
Once the dough is ready, turn out onto a floured rolling surface. Divide into two discs; place on aside. Begin with the first disc by rolling out into a rectangle, roughly 12″-14″ wide x 8″-10″deep. Starting at the long edge closest to you, “jelly roll” the rectangle; that is, roll it on top of itself {it will be like making a cinnamon roll}. Seal the edges and seam by pinching tightly with your fingers. Place directly onto the prepared baking sheet, seam side down. Repeat with the other disc.

Cover with a clean kitchen towel and let rise 50 minutes in a warm location.

About 20 minutes before the rising stage is complete, preheat the oven to 400 degrees.

Once the rising stage is complete, slash the top of each loaf 5 or 6 times with a sharp knife, and brush lightly with cold water. Bake in the oven for 15 minutes and then lower the temperature to 350 degrees. Bake for an additional 10-15 minutes, keeping a close watch. The bread should should hollow when tapped, and be a beautiful golden brown.

Serve with any of your favorite spreads – I love using my compound butter!

bread will keep fresh on the counter, tightly wrapped, for up to 3 days. Freeze any remaining by wrapping in foil.

peanut butter & jelly bread

Serving up nostalgia, one slice at a time.

IMG_4357

I happened across this idea not too long ago. In fact, you may remember the last trip that the hubs and I took – our Bourbon Trail tour of Kentucky, that is. We mixed it up this time; a bit of hotel time and a bit of tent camping time, all interwoven in one weekend. It’s easy to plan your first meal of the day when staying in a hotel, but what’s a cook to do when she knows they will only have campfire heat {if that} on one of the other mornings?

Enter: peanut butter and jelly bread.

I couldn’t tell you what made me think of this. I know that the hubs loves a good, ol’ fashioned PB&J sandwich…I mean, who doesn’t?…but the thought of making it into one cohesive loaf? Has this gal lost her mind? Once I set upon the idea, I knew that I needed a little bit of research and credibility on my side; something to back me up, if you will. And when I found the recipe below, my guideline, I knew that I had struck gold.

It truly doesn’t get much simpler than this, y’all. We’re talking easy as pie, a one-bowl wonder breakfast bread. It comes together in know time and, from personal experience, is rib-sticking-you’ll-stay-warm-and-full-all-morning kind of good. Whole wheat flour packs a nutritious punch, and heightens the nutty taste of the peanut butter that’s folded in. With no added sugar, the fruit preserves and dried cranberries are able to shine their brightest. Greek yogurt brings protein into the mix, helping you power right through your morning.

IMG_4350

IMG_4353

And the best part? You can slice this ahead of time, freeze it individually, and simply warm up as needed for breakfast on the go. Winning!

~~~

Peanut Butter & Jelly Bread {recipe adapted from Whole Foods Market}

A fun twist on a classic sandwich, this bread is sure to bring a smile to everyone’s faces! You get all of the flavors of a standard PB & J, but in one easy-to-hold slice of bread. Wonderful warmed in the oven once sliced, too!

Ingredients:

1 cup all-purpose flour

3/4 cup whole wheat pastry flour

3 tbsp. ground flaxseed meal {optional}

1 tsp. baking powder

1/2 tsp. baking soda

1/2 tsp. sea salt

3/4 cup low-fat buttermilk

2/3 cup peanut butter

1/2 cup fat-free vanilla Greek yogurt

2 large eggs

1/2 to 3/4 cup fruit preserves of your choice

optional: cinnamon-sugar to sprinkle on top of the loaf 

optional: dried cranberries or other dried fruit to layer in with the preserves 

To Prepare:

Preheat the oven to 350 degrees. Generously spray a loaf pan with non-stick cooking spray, and set aside.

In a large bowl, whisk together both flours, {optional} flaxseed meal, baking powder, baking soda, and salt. In a smaller bowl, whisk together the milk, peanut butter, yogurt, and eggs. Gradually stir the peanut butter mixture into the flour mixture until just combined. Do not overmix!

Spoon half of the batter into the bottom of the loaf pan, making sure to get it into all of the corners. Spread the fruit preserves evenly over that first layer of batter, and top with the optional dried  fruit. Top with remaining batter, and smooth out to seal in the jam. If desired, sprinkle with cinnamon-sugar mixture.

IMG_4352 IMG_4354 IMG_4355 IMG_4356

Bake for 55-65 minutes {your oven may vary slightly}, or until a knife inserted into the center comes out clean. Let cool in the pan for about 5 minutes, then turn out onto a rack and allow to cool completely. Cut into slices and serve!

IMG_4359

caramelized onion & rosemary focaccia bread

In my humble opinion, texture and flavor are paramount when it comes to bread. Maybe because I grew up in a household where homemade bread was the standard, but I have such a hard time really enjoying a sandwich if the bread is lackluster. Let’s look – you put in the time, effort and resources into what goes BETWEEN the bread; why should we not do the same with the bread? It is the foundation of the sandwich, after all!

This bread I’m sharing today, for example, is one of my absolute favorites. Thin, crispy, and overflowing with bold flavors…to me, it doesn’t get any better than focaccia bread. It’s a bit of a labor of love, if I’m being totally honest – this is not one of the breads where you can set a timer, leave for the day and expect to walk in the front door with a fresh loaf of bread awaiting you. This bread takes TIME and LOVE. Aside from a quick rise in the bread machine, the majority of the work is done with good old-fashioned elbow grease. But I daresay that this is what makes this focaccia so spectacular.

IMG_4362

IMG_4363

IMG_4364

IMG_4366

A generous helping of caramelized onions prepared low and slow on the stovetop, with lots of seasoning and oil, is the crowning glory. The bread itself is studded with notes of dried rosemary; the use of whole wheat flour {in addition to the regular bread flour} adds a nutty bite and gives it that extra crunch. I’ve even been known to fold a bit of kalamata olives into the topping – wow! No matter how you serve this {sliced in half as a sandwich, toasted and topped with a fried egg and avocado}, you’ll be a convert. Focaccia, the one to rule them all.

IMG_4372

~~~

Caramelized Onion & Rosemary Focaccia Bread {bread recipe from “The Bread Machine Cookbook III}

Ingredients {for a medium-sized dough}:

1 cup water

1-1/2 tbsp. olive oil

1-1/2 tbsp. honey

1/3 tsp. salt

3/4 tsp. dried rosemary

1-1/2 cups whole wheat flour

1-1/2 cups bread flour

1-1/2 tsp. yeast

*optional: 1 heaping tbsp. vital wheat gluten

*for the baking pan, you will need cornmeal {this will prevent the dough from sticking}

Ingredients {for topping}:

2 medium white onions, finely sliced

2 tbsp. dried rosemary

salt & pepper, to taste

olive oil, for drizzling

To Prepare:

Assemble your list of dough ingredients into the basin of your bread machine, and use the dough cycle according to your manufacturer’s directions. My dough cycle usually runs for 1 hr. and 50 minutes, but machines will vary slightly.

Prepare your rimmed baking sheet by sprinkling with cornmeal.

Once the dough cycle has run its course, turn it onto the prepared baking sheet. Using the tips of your fingers, gently press out the dough so that it stretches out slightly and reaches into the corners of the dish. Make sure you leave divets from your fingers, as this is what will hold in the olive oil and toppings while it bakes. 

Cover with a clean dish towel and set in a warm, dry place to rise. It will take about 45 minutes to an hour.

With about 30 minutes before your dough is done rising, preheat your oven to 375 degrees.

Heat a saute pan over medium heat, and drizzle with olive oil. Once the olive oil is nice and hot, add in your onions and season with salt and pepper. Cook, stirring very infrequently, for at least 10-15 minutes or until the onions begin to turn a caramelized brown. Remove from heat and set aside.

Before placing the bread in the oven, cover with the caramelized onions and dried rosemary. Drizzle liberally with olive oil, and top with a dash of salt and pepper. Bake for 30-35 minutes, or until the top is starting to turn light brown and the edges are crisp. Cool completely, and store tightly covered. It will keep at room temperature for 3 days; any longer and it should be transferred to the refrigerator or frozen.

IMG_4373

**to reheat: place in the center of the oven and bake at 425 degrees until warmed through.

cranberry-studded pumpkin honey biscuits

If we were having breakfast together this morning, this is what I would make for you. Warm biscuits, studded with cranberries, fresh out of the oven. Hints of maple syrup and cinnamon are wafting throughout the kitchen, making it seem ever so inviting.

I’d pour you a cup of coffee {or tea!} and we would sit down at the table, lounging and talking. A plate of biscuits between use, that seems to keep refilling itself, keeps the conversation flowing and the mood light. A slight breeze is coming in through the kitchen window, but we’re not chilled because of these gems.

You might ask – where does the golden color come from? And I would tell you “pumpkin”! We’d laugh about how pumpkin is so overused during the fall, but who are we to complain? We’re enjoying and indulging in said biscuits, without a crumb to be left over.

Before you leave, and we begin our day in the real world, I would hand you the recipe, along with any leftovers. But if I’m being honest, I’m sure we polished them off, without a blink of an eye or a speck of regret. They’re that wonderful.

~~~

Cranberry Honey Pumpkin Biscuits with a Caramelized Maple Glaze {recipe adapted from Food 52}

Warm, spiced, with cranberries studded throughout, these biscuits are the perfect start to any fall morning. A caramelized maple glaze, brushed on top just before the baking session is complete, is the best complement to the flavors within. Flaky and light, these won’t weigh you down – replacing the butter with our trusty Greek yogurt lets you indulge without feeling guilty. So go ahead! – smear on a little whipped honey butter and enjoy. 

Ingredients:

2 cups all-purpose flour

1 tsp. kosher salt

1 Tbsp. baking powder

2 tsp. cinnamon

1/4 tsp. ground ginger

5-6 ounces of plain 0% Greek yogurt, very cold {or, use 4 Tbsp. unsalted butter if preferred}

1/3 cup pumpkin puree

6 tbsp. honey

3/4 cup low-fat buttermilk

1/4 to 1/4 cup dried cranberries

For the Glaze:

2 Tbsp. pure maple syrup

1/4 cup of vanilla sugar {I keep a jar, on hand, of a mixture of cinnamon and sugar that I’ve stuck a vanilla bean in – the longer it sits, the better it gets!}

To Prepare:

Heat oven to 425 degrees. Flour a large wooden cutting board and rolling pin, and set aside.

In a large mixing bowl combine the flour, salt, baking powder, and spices.

In a smaller mixing bowl combine the pumpkin, honey, and buttermilk. Whisk with a fork to combine.

Cut the Greek yogurt into the flour mixture using your fingers, two knives, or a pasty cutter until no pieces larger than a pea remain.

Stir all but the last 1/4 cup of the buttermilk mixture in with a fork just to combine. If the mixture seems dry, add in the additional 1/4 cup {I ended up using the entire wet mixture}. It should be sticky! Fold in the cranberries.

Turn the dough onto your cutting board. Sprinkle top of dough with flour, and pat into a rectangle, fold in half, rotate clockwise, pat back out, and fold again. Repeat this once more, and then gently pat the dough out until about 1″ thick.

Great a baking sheet, and using a floured 2-1/2″ biscuit cutter, cut out the biscuits, being care to not twist the cutter. Place the biscuits on the baking sheet, touching.

Gently reroll the scraps as needed until all the biscuits are cut, and then bake for 15 minutes.

Remove from the oven and turn on the broiler. Brush the tops of the biscuits with maple syrup, then sprinkle with vanilla sugar. Place the biscuits back in the oven, and don’t leave their sight! You want to pull them out just when the maple syrup starts to bubble, and the tops start to darken ever so slightly.

Place on a cooling rack to cool completely. Store, tightly covered, at room temperature. After a day or so, transfer to refrigerator {simply pop in the oven to reheat – perfection!}.

Let’s Discuss: do you have a favorite biscuit recipe? 

savory sausage roll

Y’all, today’s recipe is another classic bread machine recipe.

This savory dish evokes memories of my childhood. Most Christmas Eve celebrations were spent with just the family at home. After attending Mass, my sisters/mom/myself would spend time together in the kitchen, putting together a veritable spread of tasty treats out for us to nosh on and enjoy for the rest of the evening. I can’t quite put my finger on the first year we had this, but after one bite of trying this dish, you’ll understand why it’s a frequent culinary visitor in our home.

IMG_3628

While I’ve veered ever so slightly from my mom’s original recipe, the foundation and flavors of this remain the same. The smoked turkey sausage holds up brilliantly to the flavors of the dried rosemary and Italian cheese we will be incorporating into the filling. Using some whole wheat flour in the dough adds a slightly warm and nutty flavor, which is perfect for this early autumn season. Its exterior is perfectly crisp and golden, making it the perfect vehicle for dipping a la fondue style, or for building an open-faced sandwich {if you’re feeling particularly adventurous!}.

IMG_3619 IMG_3618

This is a great dish for entertaining with, too! It can be 100% prepared in advance, and after it has cooled, can be wrapped tightly in foil and either refrigerated or frozen until needed! Simply pop it in the oven until warm and crispy throughout, and you’ll be the hit of the party.

~~~

Savory Sausage Roll {recipe adapted from The Bread Machine Cookbook III}

Easy to prepare and insanely delicious, this dish is great for easy meals and entertaining. The filling can be tailored to suit any taste – hot or sweet Italian sausage can be used, the type and amount of cheese can be adjusted, and other flavorings/spices can be added. This one is sure to win the stomachs over of whomever tries it! 

Ingredients: for a medium-sized roll

1 cup water {you can use apple juice, if you’d like}

1-1/2 tbsp. olive oil

1-1/2 tbsp. honey

1/3 tsp. salt

1 tsp. dried rosemary

1-1/2 cups whole wheat flour

1-1/2 cups bread flour

1-1/2 tsp. yeast

Ingredients: for the filling

1 package of smoked sausage {I like to use a smoked turkey sausage}, cut into slices

1 medium onion, finely diced

1 green pepper, finely diced

2 cloves garlic, minced

1 cup of shredded Italian blend cheese

salt and pepper, to taste

To Prepare the Dough:

Add ingredients listed above into your bread machine, and cook on the prescribed manufacturer settings. As a point of reference, my dough cycle runs about 1 hour and 50 minutes, or I can opt for the quick cycle and have it done in 45 minutes.

To Prepare the Filling:

When the dough has about 40 minutes left, start to assemble the filling.

In a large non-stick skillet, drizzle in some olive oil and let it heat up to medium heat. Add in the sliced sausage, and cook until the edges begin to brown and the insides start to caramelize. Add in the diced onion, diced pepper, and garlic. Season with salt and pepper, and cook 7-10 minutes, until the onion is translucent and the peppers have softened slightly.

IMG_3618

Remove from heat, and transfer the mixture into the bowl of your food processor. Pulse several times, or until the sausage has been broken up slightly {you want it to look like ground meat, with the flecks of garlic and vegetables running throughout}.

IMG_3621

Allow to cool until the dough has run its course; we want it to be room temperature, ideally. Once cooled to room temperature, fold in the shredded cheese.

Assemble the Sausage Roll:

Preheat your over to 350 degrees. Line a rimmed baking sheet with either a Sil-Pat sheet or parchment paper {I like to give it a good spray, too, for good measure}.

Once the dough cycle is complete, flour a large surface where you will do your rolling. Turn the dough out onto the surface, and roll out into a large rectangle.

IMG_3620

Spread filling mixture evenly across the entire surface, leaving a small border around all four edges. Roll up, jelly-roll style, until completely encased in itself. Pinch all edges closed, and transfer to lined baking sheet.

IMG_3622

Rub the top with a little olive oil and sprinkle with additional rosemary to garnish, if desired. Bake in preheated oven for 45 minutes, or until golden brown and sounds hollow when tapped. IMG_3627

*if you find your roll taking longer than the prescribed 45 minutes, increase the oven temperature to 375 degrees and allow to finish off. It is also helpful to rotate the pan halfway through the baking process. 

Let’s Discuss: what are some other fun ingredients you could imagine putting into a dish such as this? I can totally see myself making a chicken florentine style roll….complete with shredded chicken, Itlain meats, spinach and spicy peppers!


homemade pizza dough

This is a trip down memory lane for me, y’all.

Since I was in elementary school, my mom has had a bread machine. Homemade breads, pretzels, muffins and the like were never short in our household growing up; in fact, I’m fairly certain the 5 of us would burn through at least one large loaf a week. I have fond memories of coming home from school and walking into the house smelling of fresh bread, which I would then slather with Nutella {old habits die hard, I suppose!}. But I have to say that one of my favorite memories associated with said machine was ‘homemade pizza night’.

You see, every Friday, the family would congregate in the kitchen, crowding around the countertops and bumping elbows to decorate their own pizza. My mom and dad would usually share a large one {split down the middle}, and my 2 sisters and myself would each get our own. I can honestly say that it’s fairly easy for me to cluster my youth by pizza topping categories. The best memories are oftentimes associated with food and communal table gathering, especially with my foodie family, so I’m sure you’re not too surprised by this.

But anyways – as I said, even up through high school, Friday night was always reserved for this family tradition. Sure, as we got older, high school football games on Friday nights may cut into the evening time, but it was still always important for us as a family to keep up this tradition. It’s one that, when I moved away for college, I would anticipate with such enthusiasm upon trips home. It’s real serious.

And today, this is a tradition that my husband and I now share together. The first time he was able to experience homemade pizza, I’m pretty sure he looked like he was in absolute heaven. Paired with a nice bottle of red wine {for you over 21ers!}, this meal is the perfect way to decompress from a long week at work – sit back and let your bread machine do the work, prep a few toppings, and before you know it, you’re tucked in on the couch flipping through your Netflix :)

~~~

Homemade Pizza Dough

this is the recipe that my mom has used for as long as I can remember. It can be adapted to be done in a standing mixer, but the method and recipe will be slightly different. If you don’t have a bread machine, check out this post from Shutterbean. You’ll just need to carve out a little extra prep time. 

Ingredients:

1-1/2 cups water, room temperature

3 tbsp. light olive oil

4 cups all-purpose flour

3/4 tsp. honey

1 tsp. kosher salt

2 tsp. yeast {for use with a bread machine}

optional: 1 heaping tbsp. of vital wheat gluten 

extra flour, for dusting your board

cornmeal, for baking sheets/pizza stones

*special equipment: bread machine

To Prepare:

In the following order, add the ingredients into the well of your bread machine: water, olive oil, honey, and the all-purpose flour {make sure to evenly cover the water so the yeast will not mix early with it}. In one corner atop the flour, add the salt. In a separate corner, add in the vital wheat gluten. Lastly, form a slight well in the center of the flour and add in the yeast. Cover it lightly with the flour.

Set according to your manufacturer’s instructions. The particular model that I have has a dough cycle that runs for 1 hour 50 minutes, or if I’m in a pinch, I can run it on the quick cycle for 45 minutes.

Preheat your oven to 425 degrees.

Once your dough has completed, turn it out onto a surface dusted with flour. Divide the dough (I typically get 4 personal-sized pizzas out of one batch) and roll out to desired thickness. Lay each onto a baking sheet or pizza stone sprinkled with cornmeal.

Now, it’s time for the fun part!!! Let yourself get as creative as you’d like with your toppings/sauces…after all, that’s the best part of making pizza at home! I’ve listed below a few of our favorite, tried-and-true combos…

-marinara/mozzarella/parmesan/pepperoni/mushroom

-marinara/mozzarella/mushrooms/sausage

-marinara/mozzarella/parmesan/pepperoni/sausage/olives

-fresh tomato slices/romano cheese/caramelized onion/spinach/chicken

-salsa {as the “sauce”}/mexican cheese/chicken/pineapple/red pepper flakes

-no sauce{!})/sausage/spinach/blue cheese/hot sauce {drizzled on after coming out of the oven)

-fresh tomato/spinach/proscuitto/caramelized onion/mushrooms

-alfredo sauce/chicken/sausage/diced tomato/basil

…of course, feel free to experiment! Classic combinations are a never fail, so don’t be afraid to go with what you love!

Once you’ve completed your masterpiece(s), place onto baking racks in oven. I typically let mine go for 15 minutes, then rotate pans (top pizza onto lower rack, and lower pizza onto top rack). Depending on your oven, you’ll need anywhere from 8-15 more minutes to complete the cooking cycle. If you like your’s bubbly and crisp like I do, start your pizza on the bottom and let it finish cooking on the top rack.

It’s pure heaven if you sprinkle a bit of fresh cracked pepper and kosher salt on top once they come out of the oven.

Enjoy! This will certainly be a tradition in the making, much as it has been in my family.

whole wheat zucchini bread

It’s that time of year. Gardens are overflowing with zucchini, and those blessed with a green thumb are practically begging to give them away. Friends, strangers, and everyone in between hear the oh-so-familiar summer phrase – “Can I interest you in some produce from my garden?”

photo6

photo7

And trust me to be the girl jumping up and down, waving hands frantically – “I’ll take as many as you’d like! Lay ’em on me, good sir!”

…then I get home and, in my haze of veggie-loving excitement, realize that I have little means of storing said vegetables properly for the long-term, and carving out time in our insanely busy summer schedule is proving hard to get a lot of canning and other food-prep done.

So I’ve had to get creative, yall. Said zucchinis have found their way into many facets of our eating habits lately: diced up and stirred into marinara sauces, spiralized for “zoodles” at least 3 times, cut into sticks and eaten raw with dip, and probably the biggest stretch – I’ve put them in my juicer with apples and carrots. Sounds weird…yes. Delicious? You better believe it.

However, my favorite way by far to use up this tasty vegetable is to sneak it into treats! That’s where this bread comes in.

Slightly sweet with the additional of vanilla Greek yogurt and dried cranberries, this is breakfast bread you can really get into and not feel guilty about! The majority of the oil is replaced with said yogurt and unsweetened applesauce, and whole-wheat flour gives you a nutty, earthy taste. Cinnamon takes the flavor to a well-balanced place. The small amount of sugar helps highlight the natural sweetness of the zucchini, and the bread itself is so wonderfully moist. Sliced fresh from the oven, it’s tantalizing aroma will beg you to be enjoyed immediately!

photo14

~~~

Whole Wheat Zucchini Bread {adapted from Whole Foods Market}

Ingredients:

cooking spray

1-1/2 cups whole wheat pastry flour

1/2 tsp. kosher salt

1/2 tsp. baking soda

1/2 tsp. baking powder

1 tsp. ground cinnamon

1 egg

1/8 cup vegetable oil

1/2 cup unsweetened applesauce

2 tbsp. vanilla Greek yogurt

1/2 cup sugar

2 tsp. vanilla extract {I used my homemade version!}

1 cup grated zucchini

1/2 cup dried cranberries, optional

To Prepare:

Preheat oven to 325 degrees. Spray an 8″ loaf pan with cooking spray, and set aside.

In a large bowl, sift together flour, salt, baking soda, baking powder, and cinnamon.

photo1

In a separate bowl, whisk together the egg, oil, applesauce, yogurt, sugar and vanilla. Add flour mixture and stir until well combined. Fold in zucchini and cranberries, then transfer batter to prepared pan.

photo2 photo3 photo4 photo5

Bake until risen, and the color is a deep golden brown, about 60 minutes. A toothpick should come out clean when inserted.

photo8 photo9 photo10

Cool in pan on rack for 30 minutes, and the remove bread from pan. Leave it to finish cooling completely.

photo11

photo12

To store, wrap tightly in seran wrap. Bread can be left on the counter, tightly wrapped, for up to 2 days. After that, store in the refrigerator to preserve freshness. 


Let’s Discuss: How do you and your family feel about adding vegetables to baked goods? 

buttermilk biscuits

The perfect biscuit, in my oh-so-humble opinion, should be perfectly flaky yet still fluffy, light, and moist with no heaviness.

Seems like a pretty tall order, eh?

photo1

I’ve always been a fan of the perfect biscuit – a match made in heaven for the classic breakfast sandwich, a reliable vehicle for butter and jam, or kept simple and drizzled with just a touch of honey. But it’s been a tried and true search, dears. Copious amounts of research and many trial-and-error batches have resulted in my putting a halt on this quest for some time now. You see, I’m picky when it comes to this particular bread – I’ve never been fond of using lard in cooking, or shortening, and have found that it’s easy to over {or under} estimate the amount of butter needed to create those perfect layers.

When we had company a few weeks back, I decided to give this infamous recipe, this culinary enemy of mine, another go. Rather than re-exploring previous recipes, I opted for a fresh start. That being said, and having spoken with my previous experiences of different bases, I settled on exploring the buttermilk route. I knew that its creamy texture and tangy bite would be a good base for my dough, but didn’t want to travel down the {errenous} method of baking sans recipe. When I stumbled upon this one, I knew I had found a winner. A perfect balance of tangy buttermilk and rich butter {neither too much nor too little of each!} ensured me that I would come up with the perfect biscuit.

Do try and make these yourselves! Once set in the oven and baking, the aroma will tantalize you terribly. I promise, these won’t last more than a day or so.

~~~

Flaky Buttermilk Biscuits

{recipe adapted from Cooking Light}

Ingredients:

2 cups all-purpose flour*

2-1/2 tsp. baking powder

1/2 tsp. kosher salt

5 tablespoons chilled butter, cut into small pieces

3/4 C. low-fat or fat-free buttermilk {because it’s summer, hot and humid, I probably used close to 1 C. total in this recipe}

3 Tbsp. honey

Preparation:

Preheat oven to 400 degrees.

Lightly spoon flour into dry measuring cups; level with a knife. Combine the flour, baking powder, and salt into a large bowl.

photo1 (1) photo2

Cut in the butter with a pasty blender or 2 knives until the mixture resembles coarse meal {you don’t want to overmix! – this will result in a tough biscuit}. Chill for 10 minutes.

 photo4

Combine buttermilk and honey, stirring with a whisk until well blended. Add buttermilk mixtures to flour mixture; stir just until moist.

Turn dough onto a lightly floured surface, and knead lightly 4 times. Roll dough into a {1/2 inch thick} 9×5 rectangle; dust top of dough with flour. Fold dough crosswise into thirds {as if folding a piece of paper to fit into an envelope}. Re-roll dough into a {1/2 inch thick} 9 x 4 rectangle; dust top of dough with flour. Again, fold dough into thirds, gently roll or pat into a generous 1″ thickness. Cut dough with a biscuit cutter to your desired size. I got 9 out of this size and amount. 

photo5

photo7

Place dough rounds about 1 inch apart on a baking sheet lined with parchment paper. Bake at 400 degrees for 12 minutes, or until golden. Remove from pan; cool 2 minutes on a wire rack.

photo8

Serve with your desired toppings and spreads.

Biscuits will keep, covered at room temperature, for about 2 days. Any longer than that, I would transfer into the refrigerator. 

bourbon caramelized apple scones

There’s nothing quite as comforting on a lazy weekend morning than a platter piled high with freshly baked scones, no?

photo1

Inspired by the flavor combination I seem to be in love with as of late {does anyone recall these doughnuts, or this batch of granola from earlier this year?}, I set out to recreate yet another sweet version featuring this wonderful flavor combination. Yes, it certainly is reminiscent of fall, but to me, it’s a flavor combination that pairs well with a freshly brewed cup of coffee or strong cup of tea year round.

photo15

photo9

I think that, for me, what really sets this recipe over the top is the use of bourbon in the apples. It’s still one of those flavors that is intensely strong for me, but in the best sort of way. Smoky and nutty, with a hint of vanilla, it makes the perfect accent to the sweet flavors of the caramelized apples we haphazardly fold into the scone batter. Big chunks are what it’s all about, dears. If you’re going to go all out for breakfast, why keep anything small?

…and in case you’re feeling particularly adventurous when preparing this recipe, why not give Greek yogurt a try, in place of the butter? I promise you, there will be no difference – the end result is still light and flaky as if butter was used, but now, you can have two instead of one and not feel any remorse.

So pour yourself a beverage, tie on your apron, and let’s get to baking, shall we?

~~~

Bourbon Caramelized Apple Scones {recipe adapted from Joy of Baking}

makes: 8 scones

Ingredients:

2 cups all-purpose flour

1/4 cup sugar {I use my favorite turbinado sugar}

1 tsp. baking powder

1/2 tsp. baking soda

1/4 tsp. salt

1/2 cup Greek yogurt, very cold {feel free to swap out for an equal amount of very cold unsalted butter, cut into cubes}

2/3 to 3/4 cups buttermilk {if you’re out, check out this great tip we talked about not to long ago!}

For the bourbon caramelized apples:

1 Tbsp. unsalted butter

3 apples, finely diced

1.5 ounces bourbon {you can omit if you prefer to not cook with alcohol}

1/2 tsp. vanilla

pinch salt


To Prepare:

Make the Apples:  melt the butter over medium-low heat in a large skillet. Add in the apples then sprinkle with a dash of salt, stirring to coat evenly with the melted butter. Cook for 3-5 minutes, until the apples become slightly tender. Add in the bourbon and vanilla, then cook for several minutes {3 to 5} until the apples are soft and the alcohol has evaporated. Set aside to cool completely.

photo14

photo9

Make the Scones:  preheat the oven to 400 degrees, placing the cooking rack in the center of the oven. Line a baking sheet with parchment paper {I like to give it a spritz with cooking spray, just to make sure nothing sticks}. Set aside.

In a large bowl, whisk together the flour, sugar, baking powder, baking soda, and salt. Add in the Greek yogurt {or butter}, using either a pastry cutter or two knives, blending the fat into the flour mixture. It should look like coarse crumbs. Add in the buttermilk {I usually find myself using the full 3/4 cup} and stir gently, just until the dough comes together. Add in the cooled apple mixture, folding in until it just marries into the dough. Do not overmix!

photo13

photo12 photo8

photo7

Transfer the dough onto a lightly floured surface and knead gently; really, you’re just working in any large crumbles of dough. Pat the dough into a disc roughly 8″wide.

photo6 photo5

Bake for 20-25 minutes {this is slightly longer than a typical scone recipe, because the addition of the cooked apples adds in more surface area and mass to cook}, or until golden brown and a toothpick inserted in the middle comes out clean. Remove from oven and transfer to a wire rack to cool completely, then cut into 8 equally-sized triangles. Can be stored, covered, at room temperature for several days*.

photo4 (1) photo3 (1)

*After 2 days or so, I will transfer them into a zip-lock bag and store in the refrigerator. To warm, simply pop them in a microwave or toast up in the oven!