butternut squash & blue cheese spread

Call me basic, but this girl loves some squash.

butternut squash goat cheese dip I howsweeteats.com

In my humble opinion, squash should be celebrated year round – not just autumn, when it’s in season and oh-so-plentiful. Typically, I try to shop seasonally {helps with keeping my food local, costs down, etc.} but squash somehow always finds a way into my cart, shopping trip after shopping trip. It’s a versatile vegetable; salads, main dishes, soup and chili {yes, even in the spring and summer!}…I never find myself tiring of it. Good thing the hubs doesn’t either, otherwise we might have a bit of a problem.

But back to the recipe, lest I get further swept up in preaching my love for squash…

This is definitely a new, and fun, twist on a squash dish. As I mentioned above, none of us are strangers to using said vegetable in all sorts of dishes. But when racking my brain for an autumnal dish to bring on a trip, I thought “why not do something squash-based?” and sure enough, the internet didn’t let me down.  This dip is seriously delicious, and seriously addicting.

Roasted butternut squash meets up with its herbacious friends in a warm, creamy spread. It is bursting with tangy blue cheese, but not so heavy that it leaves you feeling like you need a nap after just a few bites. In fact, the lot of us polished this entire dish off in one sitting, and trust me – not a single one of us felt bad about it. You can scale back on the cheese if you’d like, but I highly suggest leaving it all in. I served it with toasted whole wheat naan bread, rather than chips; they were a bit sturdier, and the nutty flavor of the naan complemented the dip so nicely.

I could easily see this as a spread on sandwiches, flatbread pizzas, dolloped onto a vegetable-based soup or stew…the possibilities are endless! And it can be prepared ahead of time, too; just assemble the dish until the step before you bake it {seal tightly and store in the refrigerator until ready to heat through}. You’ll be the star of the party with this one. Truth.

butternutsquashdip

~~~

Butternut Squash & Blue Cheese Spread {recipe adapted, slightly, from How Sweet It Is}

Squash lovers, meet your new dip addiction. Blended until creamy and smooth, lusciously rich…perfect for any get-together, and sure to please even the pickiest of palettes! The flavor combinations are out of this world. 

Ingredients:

2-1/2 cups cubed butternut squash

3 Tbsp. olive oil, plus extra for drizzling

1/4 tsp. garlic powder

pinch grated nutmeg

10 ounces crumbled blue cheese {I used a reduced-fat version, but full-fat would be fine as well}

1 Tbsp. EACH of these dried herbs: oregano, basil, parsley, sage

salt and pepper, to taste

To Prepare:

Preheat the oven to 425 degrees. Line a baking sheet with aluminum foil, and coat with nonstick cooking spray.

Toss the squash cubes with olive oil, salt and pepper. Spread out on the baking sheet and bake for 15 minutes. Toss and bake for 15 minutes more, or until tender when pierced with a fork. Turn the oven down to 350 degrees.

Add the squash {and any olive oil drippings} into the bowl of a food processor along with the nutmeg, dried herbs, and half of the blue cheese crumbles. Blend until completely smooth, and transfer to an oven-proof dish.**

Cover with remaining blue cheese crumbles, and bake for 20 to 25 minutes, or until warmed through. Stir to incorporate melted cheese on top.

Drizzle with additional olive oil, if desired, and fresh cracked pepper. Serve immediately with your dipper of choice.

butternut squash goat cheese dip I howsweeteats.com

*images courtesy of How Sweet It Is*
healthy ranch dressing

When preparing a salad, it deserves nothing but the best. Fresh, wholesome ingredients that a full of flavor. Toppings that complement the salad itself, but don’t weigh it down. And of course, there’s the dressing – for many, a necessary component. And more often than not, it’s what takes a salad from fresh, healthy and fabulous to a total calorie bomb. Why waste all that wonderful nutrition and flavor, just to be topped with something that essentially eradicates all the goodness you’ve prepared?

That’s where this salad dressing comes to play. In college, I did my fair share of overdressing my “healthy” salads with many a preportioned dressing – seemingly so innocent in its neat little package, but erasing all the healthfulness of my dinner with each satisfying squeeze of said packet. I do wish that I could go back and tell my previous self “NO!!” but alas, it’s a lesson learned. These days, I look for flavor in other ways – tangy mustard, olive oil and {lots!!} of fresh lemon juice, and today’s recipe…ranch dressing.

image c/o hcuforu.com

image c/o hcuforu.com

Yes! It’s true! Ranch dressing can be healthy, and delicious all at the same time! After stumbling upon this recipe, I tentatively tried it {you see, I was not a big fan of cottage cheese for some time, but that’s another store for another day} and both the hubs and I immediately fell head over heels for it. The texture is perfect, it’s bursting with flavor from the fresh ingredients and herbs, perfectly tangy from the buttermilk. A total win. And the bonus? – you get a pretty hefty dose of protein from the cottage cheese itself! Your salad won’t be complete without this on top from now on, trust me on this.

~~~

Healthy Ranch Dressing {recipe adapted from Eating Well}

By making a sneaky {and healthy!} swap into one of the most beloved salad dressings, the classic Ranch gets a face lift! Cottage cheese, when pureed into a silky texture, makes the ideal replacement and base for a healthy salad dressing. The addition of fresh ingredients and plenty of herbs result in a salad topper sure to please anyone! 

…and why stop there!? Use this condiment for dipping baked French fries, drizzled into sandwiches and wraps – the possibilities are endless!

Ingredients:

1 small shallot, peeled

3/4 cup nonfat cottage cheese

1/4 cup reduced-fat mayonnaise {I like to use the olive oil/mayonnaise combination, available at most stores}

2 Tbsp. white wine vinegar

1/4 cup buttermilk*

1 Tbsp. fresh dill, chopped

salt and pepper, to taste

*the amount may vary, depending on how thin or thick you prefer your dressing; simply adjust as desired

To Prepare:

With the food processor running, add shallot through the feed tube and process until finely chopped. Add in the cottage cheese, mayonnaise and vinegar. Process until smooth, scraping down the sides as necessary, about 3 minutes. Pour in the buttermilk while the processor is running. Scrape down the sides again; add in the dill, salt and pepper. Process until combined.

make ahead tip: cover and refrigerate for up to one week. 

lightened up spinach artichoke dip

A lot of times, what we deem as “traditional” appetizers often get a bad rep. I mean, it’s not hard for that to happen. When we peel back the layers of ingredients and really dive in, we find that most are loaded down with heavy, not-so-healthy ingredients…full-fat mayonnaise, cream cheese, sour cream, an oftentimes an exorbitant amount of cheese on top. And that doesn’t even take into account the accouterments {fried chips, toasted bread, crackers and pretzels}. Now don’t get me wrong! – I am a big believer in maintaining a balance; everything in moderation, exercise portion control when needed. But sometimes, you might just want to do some serious work on appetizers and not feel guilty about it!

Enter this dish…

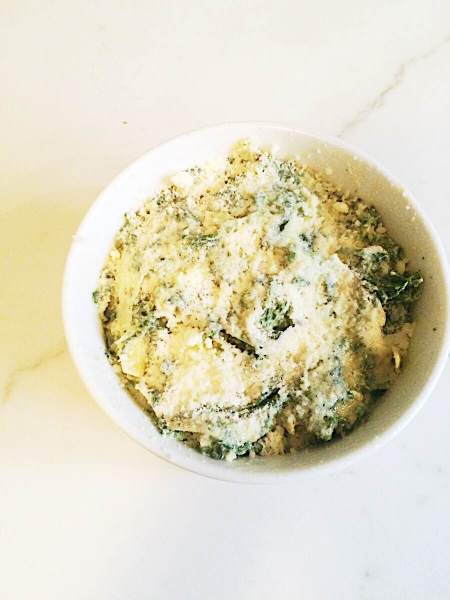
IMG_6862

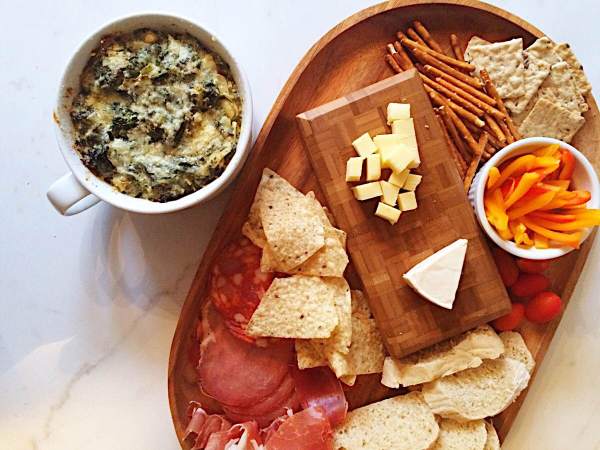
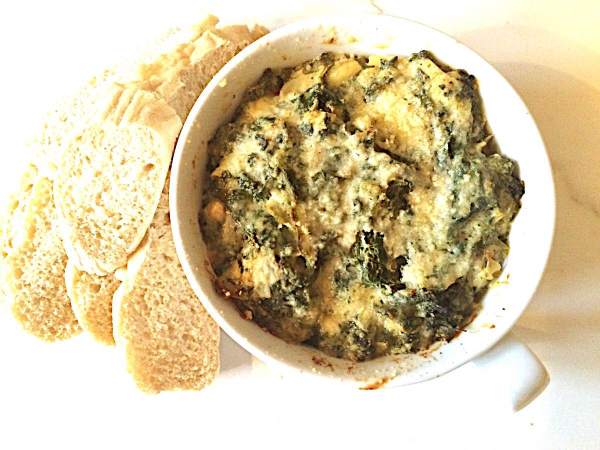
It’s bubbly, browned, crusty and FULL.OF.FLAVOR. Ladies and gentlemen, let me introduce you to your new favorite {and jazzed up!} spinach artichoke dip! Glancing down through the ingredient list, you’ll recognize instantly a few of my staples: Greek yogurt, blended cream cheese, etc. But what really makes this dish shine and stand out from its cousins is the explosion of spices and vegetables that we’re packing in. In just about 3 cups of dip, we’re utilizing smoky paprika, spicy garlic, onion powder, red pepper flakes{!!}, and tangy Parmesan. Seriously, your taste buds won’t know what hit them upon the first bite.

IMG_6859

This is a guaranteed crowd-pleaser, and is on constant rotation in our home. This can easily be doubled or tripled for the countless summer BBQs we will all surely be attending this summer; is wonderful spread onto sandwiches; I’ve even thrown it into a fritatta with shredded chicken. A dish with many purposes; not only super healthy, but super flavorful and oh-so-flexible!

~~~

Lightened Up Spinach/Artichoke Dip

A perfect dip for throwing together at the last minute, this is one of our go-to items for date nights at home. It’s tangy, refreshing, bubbling over with flavor…and good for you!

Ingredients:

12 ounces frozen spinach, cooked {make sure you drain it really well}

1 {14 ounce} can artichoke hearts, drained and roughly chopped

5 ounces of plain, non-fat Greek yogurt

2 Tbsp. cream cheese {I like to use a Greek yogurt/cream cheese blend that is available at my grocery store}

2 Tbsp. Parmesan cheese, plus more for topping

1 clove garlic, finely diced

1 tsp. smoked paprika

1 tsp. onion powder

large pinch of red pepper flakes {optional}

nonstick cooking spray

salt & pepper, to taste

To Prepare:

Preheat the oven to 400 degrees. Spray a round glass baking dish with nonstick cooking spray and set aside {mine holds about 3-4 cups worth of dip}.

In a large mixing bowl, combine all the ingredients. Mix well to combine; take extra care to make sure that the cream cheese and yogurt are thoroughly mixed into the vegetables and spices.

Spoon dip into the prepared baking dish. Top with additional Parmesan cheese.

Bake in the oven for about 30 minutes, or until the top is starting to turn golden brown and the edges are bubbling over slightly.

Serve hot with toast points, sliced vegetables, chips, etc…whatever you like.

IMG_6862

IMG_6861

Enjoy!

light & fresh crab dip

When you don’t live ocean side, sometimes you just need to bring the beach to you…no?

IMG_5451

I love to create dishes that remind me of previous trips; food is such a powerful way to evoke wonderful memories that might not often be remembered just through a photo. After all, an image doesn’t create a sensory experience other than just looking at it. While there is nothing wrong with that {in fact, I find myself looking at old photos quite often!} I have so much more fun when I can wrap multiple senses around a memory.

That is where this crab dip comes into play. While I have no particular dish to draw on for inspiration, crab dip is something that we enjoyed on beach vacations as children; later on in life, the hubs and I would have several trips with his family where we picked crabs for dinner all night long. This dish is my homage to those nights – times spent sharing stories and creating memories with those that I love.

This dish is simple to prepare; many of the ingredients you probably have on hand already. A few fresh green onions, dried herbs, and bread crumbs…in addition to the cream cheese and Greek yogurt, these are considered staples for many people {I’ll admit, I had to run out for green onions this time around, though!}.

IMG_5448

IMG_5449

The only thing that I request is that you please, please use high-quality crab meat…no room for imitation here! This is a lightened up twist on traditional crab dip; that is, we’re relying very little on creamy ingredients, so it’s vital to the recipe that you not skimp here. The crab is the star, and the other ingredients are merely there to accent it. One bite, and I promise you’ll understand.

~~~

Light & Fresh Crab Dip

Hands-down a favorite in our household, this dip is perfect for any occasion – we love to enjoy it on date nights with a good bottle of wine, or spread between toasted bread for sandwiches. Easily enough to double or triple, too! 

Ingredients:

1 {8 ounce} container of good crab meat…claw, back fin, jumbo lump all work well

1 heaping tbsp. Old Bay seasoning

2 tbsp. dried parsley

2 green onions, finely chopped

2 ounces cream cheese {I opted to use my favorite Greek yogurt and cream cheese blend}, room temperature

3 ounces plain, non-fat Greek yogurt

1/4 cup plain bread crumbs

non-stick cooking spray

salt & pepper, to taste

To Prepare:

Preheat oven to 400 degrees. Spray an oven-proof glass serving dish with non-stick cooking spray, and set aside.

In a large mixing bowl combine the cream cheese, yogurt, green onion, and herbs. Season to taste with salt and pepper. Gently fold in the crab meat, making sure to keep the pieces as intact as possible.

Carefully spoon into the prepared baking dish, then top with bread crumbs. Spritz with non-stick cooking spray {this will help ensure a crisp exterior}.

Bake, uncovered, about 25-30 minutes, or until the top is golden brown and the edges are bubbling. Serve with assorted crackers, toast points, and vegetables for dipping.

IMG_5452

IMG_5450

“snickerdoodle” cookie dough dip

I’m a woman obsessed. Obsessed with making and eating cookie dough.

IMG_5183

Many of you may remember way back to this post, when I finally put to the test the oh-so-popular “cookie dough” dip. I wasn’t really one to doubt the idea, as I am all about making indulgent treats healthier, but I knew that a certain someone in my household might not be so keen. After all, beans are the main ingredient! Am I crazy?!

IMG_4119 IMG_4126

Well, fast forward about 15 minutes later, and both the hubs and I are going all at the batch of dip that I whipped up. It was a total, 100% success! Not that I had any reason to believe otherwise. heh.

It’s been quite some time since that day, and many a batch have been whipped up since then. I’ve experimented with a few different flavor combinations to see what else I could come up with, but none shone as bright as the one we’re making today. It’s snickerdoodle style, y’all. And wow, is it incredible. I have to thank the hubs for this one, because not only is this his favorite type of cookie, but it incorporates a childhood favorite as well; cinnamon toast cereal is acting as the “grain” of the cookie, resulting in the most glorious cinnamon-sugar flavor punch imaginable. It’s fantastic, delicious, and…well….delightful.

Of course, any brand of cinnamon-sugar cereal can be used, but I had those crazy squares on hand. You could use a gluten-free option, or go the more organic route, too! It comes together in a matter of minutes, and probably won’t last much longer than that.

IMG_5184 IMG_5179

~~~

Sneaky Cookie Dough Dip {a twist on this recipe!}

The best way to indulge in all the goodness of cookie dough, but without the guilt! This dip will fool even the pickiest of eaters; they’ll be going back for seconds, and then thirds!

Ingredients:

1-1/2 cups chickpeas or white beans, drained and rinsed very well

1/8 tsp. salt

1/8 tsp. baking soda

2 tsp. pure vanilla extract

1/4 cup nut butter of choice {my homemade peanut butter works excellent here!}

up to 1/4 cup of milk {I used my favorite sweet cream coffee creamer}, only if needed

1/2 cup cinnamon-sugar cereal, plus additional for garnish

To Prepare:

Add all ingredients into the body of a good food processor, and process until very smooth. This will take anywhere from 3 to 5 minutes. Add in the liquid, a tablespoon or so at a time, until your desired consistency is reached.

Scoop into a dish and sprinkle with additional cinnamon-toast cereal pieces. Garnish with graham crackers, sliced fruit, or cinnamon-sugar toast points. Enjoy!

sneaky cookie dough dip

This fun little snack has long been on my list of “must try” recipes, so not long ago, I decided to give it a whirl!

IMG_4126


IMG_4124

And y’all, I would be crazy if I didn’t say that it wasn’t amazing. Delicious, fantastic, stunning, and fabulous also came to mind. But I shouldn’t ramble…

I always find it so wonderful that you can transform the healthiest of ingredients into something that is totally opposite of its original inspiration. I mean, this “indulgent” dessert dip has a base of beans{!}. Is that not absolutely crazy? I mean, who would have thought of taking said ingredient and deciding to throw it in with traditional chocolate chip cookie dough materials?

IMG_4120

IMG_4121

IMG_4122

IMG_4123

…if I could, I would like to give them a hug, or at least a high-five.

This dip is the perfect snack for anyone who has a sweet tooth and can’t say no to multiple spoon dips when making cookie dough, for the person who likes to munch on chocolate chips {I mean, who doesn’t do that?!}, or just anyone who like sweet treats. You will fool even the pickiest of eaters with this snack. And the best part is that you can indulge without feeling guilty! The beans are packed with fiber and vitamins, the nut butter adds in GOOD-FOR-YOU healthy fats, and there is minimal sugar. You could even swap out the chocolate chips for extra dark chocolate to get the antioxidant benefits.

But I won’t judge if you want to up the ante and use mini chocolate chip cookies for your dunkers. Just sayin’.

~~~

Sneaky Cookie Dough Dip {recipe adapted from Chocolate-Covered Katie}

The best way to indulge in all the goodness of cookie dough, but without the guilt! This dip will fool even the pickiest of eaters; they’ll be going back for seconds, and then thirds!

Ingredients:

1-1/2 cups chickpeas or white beans, drained and rinsed very well

1/8 tsp. salt

1/8 tsp. baking soda

2 tsp. pure vanilla extract

1/4 cup nut butter of choice {my homemade peanut butter works excellent here!}

up to 1/4 cup milk, only if needed

1/4 to 1/2 cup brown sugar

1/3 to 1/2 cup chocolate chips

2 to 3 Tbsp. oats

To Prepare:

Add all ingredients {except for chocolate chips” into the body of a good food processor, and process until very smooth. This will take anywhere from 3 to 5 minutes. If the mixture is too thick, drizzle in a tiny bit of milk until desired consistency is reached.

Fold in the chocolate chips and scoop into a dish. Garnish with graham crackers, sliced fruit, or cinnamon-sugar toast points. Enjoy!

roasted carrot hummus

This twist on hummus is, without a doubt, the BOMB.

IMG_3963

Full of flavor and color, this couldn’t have fallen into my lap at a better time. I mean, that vibrant orange…doesn’t that just scream “autumn” to y’all?

Gorgeous presentation aside, this hummus packs a nutritional and flavor punch. We all know that carrots are full of beta-carotenes and antioxidants. They’re a great source for both vitamins A and K. It really doesn’t get much better than that, BUT! – we’re adding in fresh lemon juice and zest in here, too. Said fruit adds in another vitamin kick, that of vitamin C. This is powerful stuff, and powerful food!

IMG_3957

IMG_3960

A great dish to put out for a Halloween party, or to dress up a tailgate, this is sure to win the crowd over. You won’t have leftovers with this one, I promise.

~~~

Roasted Carrot Hummus {recipe adapted from Power Hungry}

This is a wonderful twist on a classic dip – roasting the carrots not only enhances the flavor, but results in a beautifully hued dish. Wonderful served cold or warmed!

Ingredients:

1 lb. carrots {about 6 large} cut into 1/2″ slices

6 cloves of garlic, with the skins still intact

1 Tbsp. olive oil

1/2 tsp. paprika

juice and grated zest of 1 large lemon

1/4 to 1/2 cup of low-sodium chicken stock

salt and pepper, to taste

To Prepare:

Preheat the oven to 450 degrees. Line a large rimmed baking sheet with aluminum foil.

Toss the carrots and garlic with olive oil, salt and pepper. Spread in an even layer onto the baking sheet. Roast, stirring occasionally, until tender and browned – about 25 t0 30 minutes.

IMG_3961

Let cool, the squeeze the garlic clove out of their skins.

Add the carrots and garlic into a food processor, and sprinkle with paprika. Pulse for about 1 minute, then stop and scrape down the sides. Allowing the machine to run, drizzle in the chicken stock until it reaches your desired thickness.

Transfer hummus to bowl, and serve with toasted bread, vegetables, or crackers…whatever you like!

IMG_3964

bleu cheese dressing

I may have mentioned this before {does anyone remember my lightened-up buffalo chicken dip?} but as a child, I had a severe aversion with anything and everything bleu cheese. As in, my dad would enjoy it on his salad every night, but you couldn’t pay me to get near that bowl with a 10-ft. pole. That’s a bold statement, considering at that point I was just a kid with an allowance.

However- times change, and so do taste buds. And thank goodness for continual growth and change! I’ve been a huge fan of bleu cheese for at least the past several years, most notably starting in my post-college days. Too many slices of pizza and wings dipped in basic Ranch dressing led me and my palette to seek something new and bold, full of flavor and “adult”. I chuckle when I say this.

Hands down, this is easily one of my favorite condiments nowadays. And because you all know me so well at this point, making this dressing my own was bound to happen. Obviously. But I have to credit my mom for this one, as she was the one who introduced me to making homemade bleu cheese dressing awhile back. Her mixture of full-fat sour cream and local buttermilk, flecked with salt and pepper, was absolute perfection. So naturally, I’ve done little to change her structure. By subbing in low-fat sour cream and low-fat buttermilk {I find it slightly tangier and thus, more flavorful for cooking), you will certainly not be lacking any flavor whatsoever! I can also advocate a few dashes of Worcestershire in here, or perhaps if you’re feeling adventurous…some hot sauce!

If anything, you can enjoy twice the amount you’d typically have….at least, that’s how I look at it.

~~~

Bleu Cheese Dressing {makes about 1.5 cups}

A perfect salad topper, veggie dipper, or just eaten by the spoonful. I won’t judge or tell, I promise.

Ingredients:

1 wedge of good Bleu Cheese {about 5-6 ounces}

1/2 cup low-fat buttermilk

1/2 cup reduced fat sour cream

salt and pepper, to taste *I went a little heavy with both, because they accent so nicely the flavor of the cheese
To Prepare:
Crumble the cheese, leaving some pieces larger than others. Add into the bottom of a small mixing bowl.
IMG_3433
IMG_3434
Measure out the wet ingredients, and add into the cheese crumbles. I incorporated the buttermilk first, then gently folded in the sour cream. Season with salt and pepper to taste.
IMG_3435
IMG_3437
Dressing will stay well in the refrigerator, tightly covered, for up to one week.
Let’s Discuss: did you have any dressing aversions when you were younger? Do you still? 

tzatziki

Is anyone else overwhelmed with the mass amounts of cucumbers cranking out of your garden?

IMG_3199

Let’s see a show of hands.

I will admit, I’ve had to great creative over the past weeks with the amount of produce being dropped off on my doorstep. After all, a girl and her hubby can only handle so many slices of cucumbers {sprinkled with a little coarse salt, obviously} as an afternoon snack. I’ve done everything from infusing water with these guys, to spiralizing them in salads, and layering them with soft cheese wedges.

And then I remembered that I had yet to make one of my favorite cucumber snacks – tzatziki dip! This wonderfully tangy appetizer is one of my favorites – in fact, a Greek restaurant right in our downtown area makes perhaps one of the best I’ve had. I’ll eat it by the spoonful, it’s that’s delicious.

With the idea set in mind, and friends coming over for a night of cocktails/games/cooking, I knew that this would be an excellent time to tweak my recipe. Oftentimes made with sour cream and whole fat yogurt, I wanted to lighten this up slightly so that it would still be delicious, but with healthier benefits. By swapping out the aforementioned yogurt with 0% Greek, the creamy consistency is not lost, nor is flavor. The tart bite of this yogurt pairs perfectly with the zangy lemon. Fresh, spicy garlic is added in for flavor, and dill acts as the balancing beam between the flavors. A little salt and pepper rounds it all out – you’re left with nothing but a bowl of dip so bursting with flavor {and protein! thanks to the Greek yogurt} you won’t miss a thing.

~~~

Tzatziki {makes about 3 cups}

This not only makes a wonderful dip to set out amongst other appetizers, but I absolutely love to spread it on veggie sandwiches, or use it as a topping on salads. To really ensure full flavor, make it a few hours before serving, to let the flavors truly marry together.  

Ingredients:

3 cups of Greek yogurt {I used Chobani 0%}

1 large cucumber, washed and dried well

juice of 1 fresh lemon

3 large clove garlic, minced

1-2 tbsp. dried dill, or to suit your taste

salt and pepper, to taste

To Prepare:

Using a box grater on the largest side, process the cucumber. I prefer to leave the skin on, as I like the crisp texture and vitamin boost it provides. If using a cucumber with seeds, grate only the fleshy outer area.

IMG_3203

Squeeze out any excess water and set aside.

In a large mixing bowl, combine the minced garlic, lemon juice, dill, and salt and pepper. Whisk in the Greek yogurt until combined. Fold in the grated cucumber using a spatula, making sure to fully incorporate.

IMG_3200 IMG_3202 IMG_3204

Serve alongside assorted veggies, pita bread, and crackers! Dip will last 4 days, tightly covered, in the refrigerator…though it never seems to last more than a day or so in our household ; )

IMG_3215

Let’s Discuss: what’s your favorite brand of Greek yogurt? Do you prefer cooking with a certain variety?