shepherd’s pie

St. Patrick’s Day is just around the corner, and what better way to celebrate than with a delicious and hearty meal?

Shepherd’s Pie has long been a favorite in our household; it’s easy to prepare, utilizes common ingredients most of us have on hand, and can be stretched to feed anywhere from a few people to an entire army. I love sitting down to a piping hot serving after a long day at work; the aromas are so therapeutic, and seeing the steam wafting from the bowl just brings about the most soothing feeling.

IMG_5690

IMG_5689

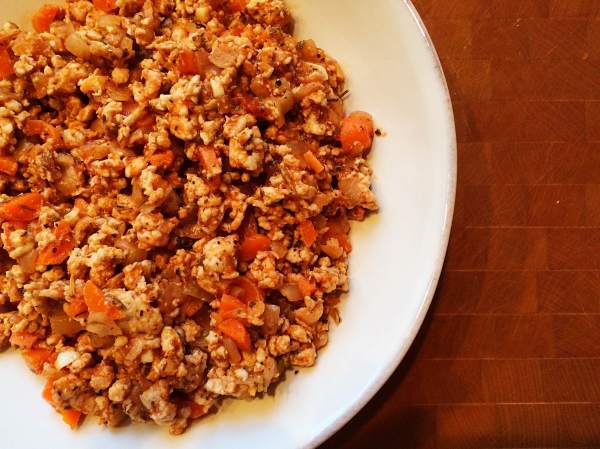
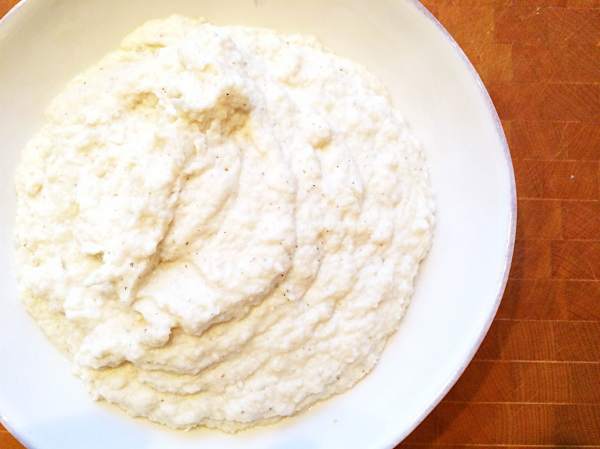
When I decided to make this, I decided to veer slightly from tradition, but still maintain the integrity of the dish. After all, you can only adjust a recipe so much before it takes on an entirely new face, no? So rather than go all crazy and try to tweak every little aspect, I picked the common denominators – the ground meat and the usual mashed potatoes – and decided to just play around with those.

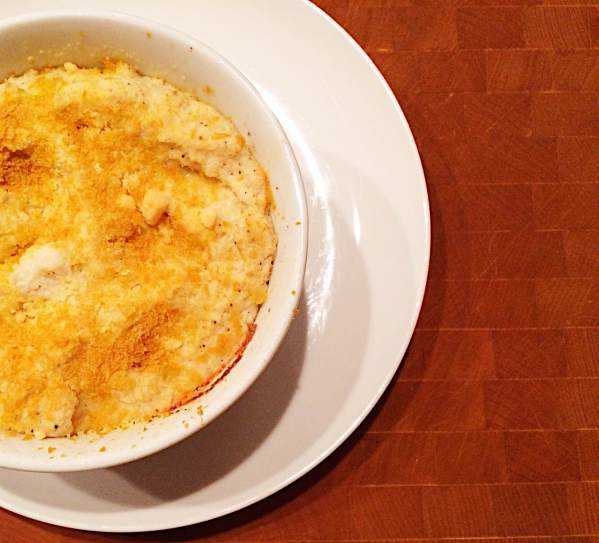
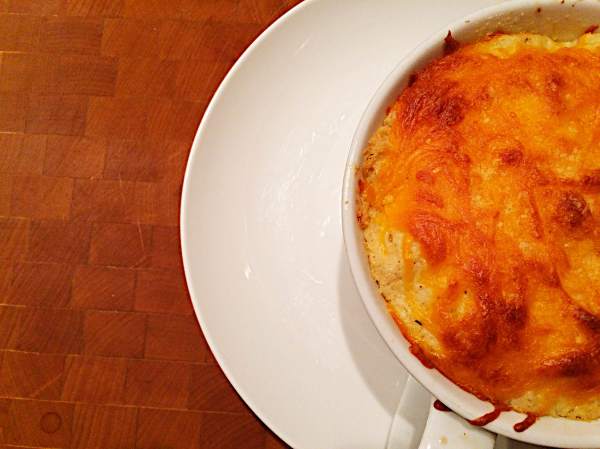
The result? Lean ground turkey and mashed cauliflower!

IMG_5685

IMG_5686

IMG_5684

This take is full of flavor, texture, and…it just makes you feel good. In my humble opinion, that is the best kind of dinner – fresh, simple, and leaves you feeling good; maybe wanting more, or…maybe just reach for a Guinness and call it a night. Your call!

Slainte!

~~~

Shepherd’s Pie {adapted from Epicurious}

What better way to ring in the celebration of St. Patrick’s Day than with a traditional dish? Quintessential in our household, this will satisfy the pickiest of palettes. The best part? – it’s healthy and good for you!

Ingredients:

1 Tbsp. vegetable oil

1 large onion, peeled and chopped

1 large carrot, peeled and chopped

3 large cloves garlic, minced

1 lb. ground meat {I used a 93% lean ground turkey – but feel free to use ground beef, ground lamb, etc.}

1 to 1-1/2 cups tomato sauce

1 Tbsp. tomato paste

1 tsp. dried rosemary

1 Tbsp. dried parsley

1 to 1-1/2 cups frozen peas, cooked and cooled slightly

mashed cauliflower {here’s my version!}

salt and pepper, to taste

optional: grated cheese of your choice for topping 

To Prepare:

Preheat oven to 375 degrees. Spray a glass baking dish {8″x 8″ or 9″x 9″} with nonstick cooking spray and set aside. Alternatively, like I did, you could use two individual baking dishes.

In a large saute pan over medium-high heat, heat the oil, then add the onion, carrot, garlic and meat. Season to taste with salt and pepper. Cook until brown, 8 to 10 minutes.

Drain the fat and then add the tomato sauce, tomato paste and herbs. Simmer until thickened, about 10 minutes.

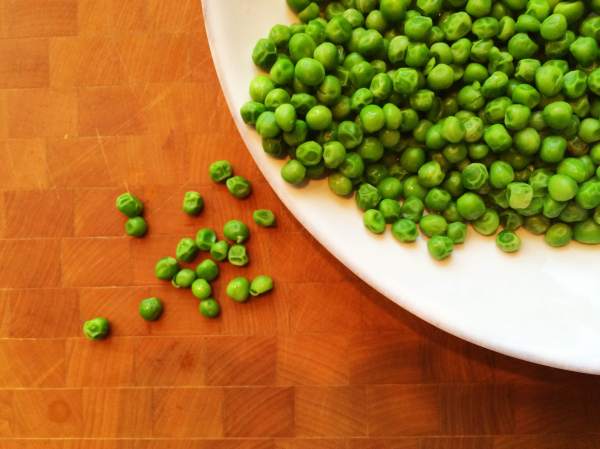
In the baking dish{es}, layer in the meat mixture, then the cooked peas, and finally top with the meat mixture. Garnish as you like with cheese.

Bake until golden brown and bubbling, 30 to 35 minutes.

spinach & squash galette

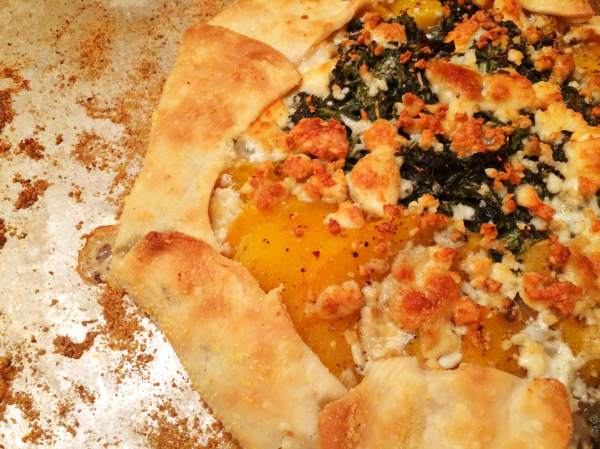
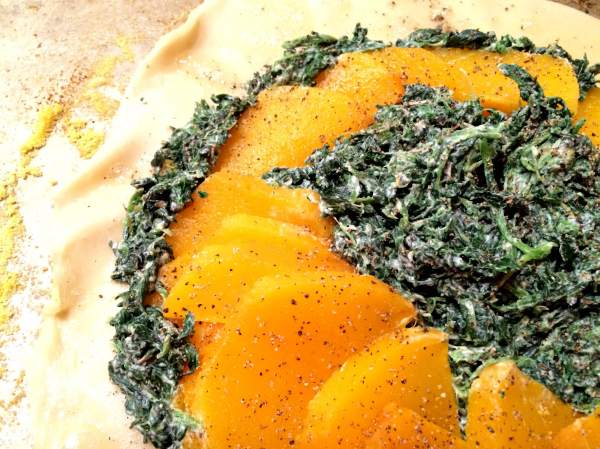
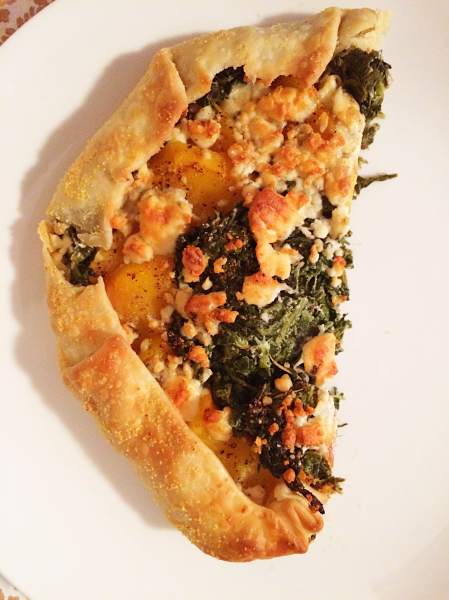
This dish is almost, almost too pretty to eat.

IMG_5304

IMG_5302

I often find that some of my most favorite recipes happen to be the ones that I throw together during the week, with whatever ingredients I happen to have kicking around in the refrigerator and/or freezer. Because sometimes I simply lack the energy to run to the grocery store after work and want to get dinner prepped and in the oven as soon as I can. This dinner was the result of said night.

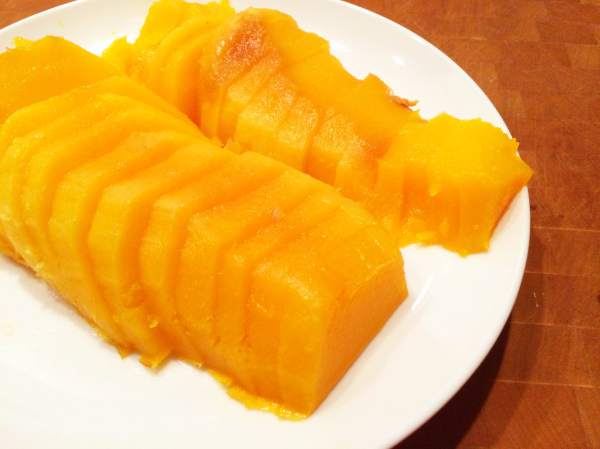
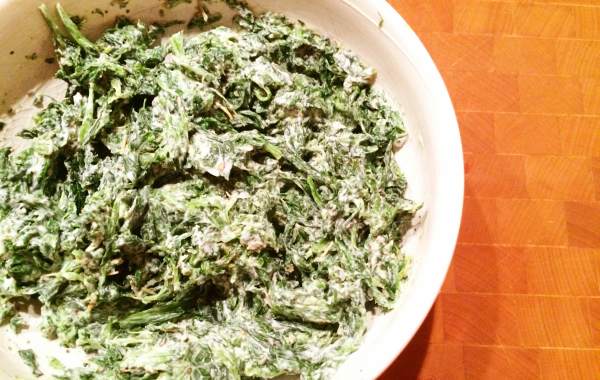
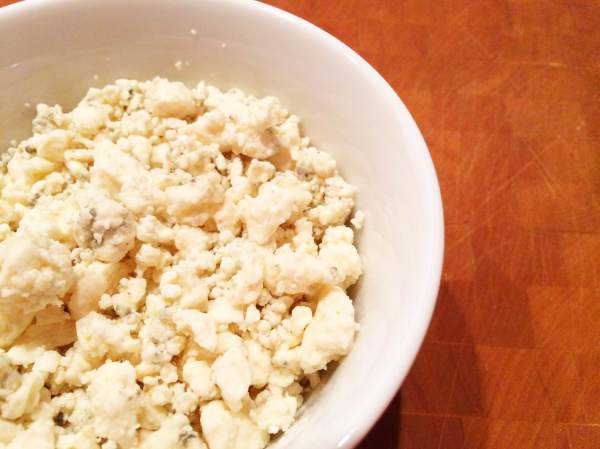
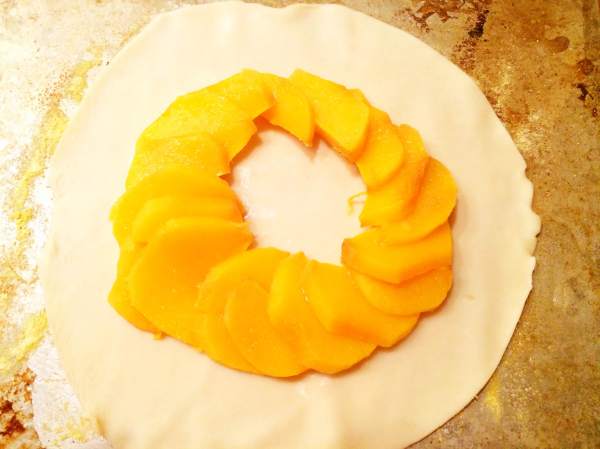
And let me just say that I could not be more thrilled with how fantastic this dish turned out. Leftover roasted butternut squash fanned out atop flaky pie crust, a creamy spinach center, and finished off with tangy blue cheese made for the most comforting dinner we’ve had in awhile.

IMG_5296

IMG_5298

IMG_5295

It’s hard to keep your “groove” in the kitchen during the week, especially after a long day of work. The hubs and I enjoyed every last crumb of this meal, feeling so satisfied and warm, it was as if this galette had given us both a comforting hug. Almost.

~~~

Spinach & Butternut Squash Galette {original recipe}

Easy to prepare with pre-roasted squash, frozen spinach and a handful of herbs and cheese, you’ll have dinner on the table in no time flat! Both you and your taste buds will be 0h-so-happy to dig in. 

Ingredients:

1 prepared pie crust disc {about 9″ in diameter}, room temperature

cornmeal {for dusting the baking sheet}

1 bag of frozen spinach, thawed and drained of any excess water

1 medium butternut squash, roasted/cooled and cut into medallions

1 cup of Greek yogurt {I used 0% fat because it’s what I had on hand, but you can use whatever your preference is}

8 ounces of crumbled blue cheese

1 tsp. dried oregano

1 tsp. dried rosemary

1/2 tsp. onion powder

1/2 tsp. garlic powder

salt & pepper, to taste

To Prepare:

Preheat oven to 400 degrees. Spray a baking sheet with nonstick cooking spray, sprinkle with cornmeal.

Unroll the thawed pie crust into the center of the baking sheet, making sure that the entire surface is smooth. Starting about 1″ in from the edge, fan out the roasted butternut squash so that the half-moon pieces overlap slightly; essentially creating a spiral shape. It should make about 2 full spirals. Continue to fan out until you have a well in the center about 4″wide {this can vary slightly, depending on the size of the squash}. Season to taste with salt and pepper.

In a small mixing bowl, combine the spinach, Greek yogurt, spices and season to taste with salt and pepper. Place this mixture into the center well of the galette and, if you find yourself having a bit extra, around the outermost edges of the squash {make sure to do this in a very thin line!}.

IMG_5299

IMG_5300

Fold the edges of the pie crust over top of the squash, being careful to not stretch too thin! Overlap each fold slightly, so that it folds on top of itself. Brush with a bit of water to ensure the edges get crisp. Sprinkle the exposed vegetables and spinach mixture with the crumbled blue cheese.

IMG_5301

Bake for 25 minutes, or until the edges begin to turn golden. Increase the heat to 425 degrees and bake for 5-10 minutes more; this will result in a browned center with crispy edges. Allow to cool 5-10 minutes before cutting into wedges and serving.

IMG_5303

Enjoy!

individual chicken pot pies

Who wouldn’t want to dive right into a bowl brimming with warm, savory filling and topped off with a flaky pie crust?

IMG_3946


We’re in full-blown, top-of-the-line, let’s-get-a-little-bit crazy comfort food mode her on K.K. As soon as the leaves start changing, my heart {and my tummy} crave rich, savory casseroles and dishes that may or may not require a bit of a nap afterward.

Enter this chicken pot pie. It fits the bill perfectly – a luscious white sauce, piping hot with steam when you puncture the top, and full of chicken and vegetable goodness. But it’s a bit sneaky, y’all! As you’re well aware by now, just because it’s comfort food doesn’t mean it needs to make you feel UNCOMFORTABLE after you’re done eating it. That’s right…I’ve put a bit of a twist on this traditional {and traditionally unhealthy} dish.

I combed through a good amount of recipes until I settled on one to use as my base. By making some minor substitutions, we’re able to capitalize on this dish and enjoy it without the guilt! We’re making individual servings to help with portion control, and only using a top and bottom crust – no sides here! You can make the top crust larger to hang over the dish, or a bit smaller so that the filling bubbles over; it’s whatever you like. And you can skip the bottom crust, but I would recommend leaving it : ) We are also swapping out the whole milk for 1% {if you are a 2% drinker, go ahead and use that!}. The amount of butter we’ll be using to thicken the sauce is just the right amount, and won’t overpower the taste of the chicken and vegetables/herbs. It’s perfectly velvety and smooth, the perfect backdrop for the gorgeous filling.

And don’t feel as though you have to follow the recipe down to a ‘T’! The vegetables I’ve listed out are, honestly, what I had on hand at the time. Sometimes, a girl just doesn’t want to run to the store for one or two things, am I right? So feel free to swap anything out – I could see this being absolutely magical made with an assortment of mushroom and chicken, or do a combination of root vegetables {sweet potato/parsnips/beets} with the chicken, or you could even go meatless! This is truly a dish that’s adaptable to any pantry.

IMG_3935 IMG_3938 IMG_3939

The best part about this recipe? It will make enough filling for a least 4 individual servings; perfect to serve up as two for now, and then freeze the rest for an easy weeknight meal!

~~~

Individual Chicken Pot Pies {recipe adapted from Food Network}

makes enough for at least 4 individual servings, in bowls with about a 4″ diameter

Steaming, full of warm and hearty goodness, these will be sure to put a smile on your face. Your stomach, and soul, will thank you after enjoying one of these!

Ingredients:

1 box prepared pie crust {I like Pillsbury because it gives two 9″ rounds, enough for a top and bottom crust}

4-1/2 cups low sodium chicken stock

large handful of baby carrots {or 5 medium ones}, evenly diced

1 to 2 tsp. dried thyme

2 tsp. dried oregano

2 Tbsp. extra virgin olive oil

1 large onion, finely diced

4 Tbsp. all-purpose flour

1/3 cup 1% milk

3 stalks celery, evenly diced

3 cups shredded chicken, skin removed

1 bag {about 2 to 3 cups} fresh broccoli

salt and pepper, to taste

To Prepare:

Preheat the oven to 425 degrees.

On a floured surface, lay out both pie crusts and cut out 4 circles. Two will be the same size as the bottom of your individual bowls, and the other two will be slightly larger {to fold over the top and seal in the filling}.

IMG_3937

Spray the dishes with non-stick cooking spray, and lay down the smaller ones in each of the bowls. Prick with a fork and bake in the oven 10 to 15 minutes, or until slightly golden and the edges begin to pull away from the bowl. Set aside.

IMG_3940

Bring the chicken stock, carrots, thyme and oregano to a simmer in a small saucepan over medium heat and cook for 2 minutes; cover and keep warm.

Meanwhile, heat the olive oil in a large pot over medium heat. Add in the onion and cook until soft, about 8 minutes. Sprinkle in the flour and stir until lightly toasted, about 3 minutes. Add in the milk and the warm broth mixture and simmer until thickened, about 15 to 20 minutes. Remove from the heat and stir in the chicken, celery, and broccoli. Season to taste with salt and pepper.

Transfer filling into each of the baking dishes, and top with the remaining two pieces of dough – these are larger, so they will drape nicely over the rims, helping to seal in the filling. Make sure to press it tightly against the sides of the dishes!

Place on a baking sheet and bake until the crust is golden brown, about 25 minutes. Allow to cool for at least 5 minutes before serving – the filling will be very hot!

IMG_3945

Let’s Discuss: did you ever have the frozen individual pot pies as a kid? What other vegetables do you like to put inside yours? 

pumpkin chili

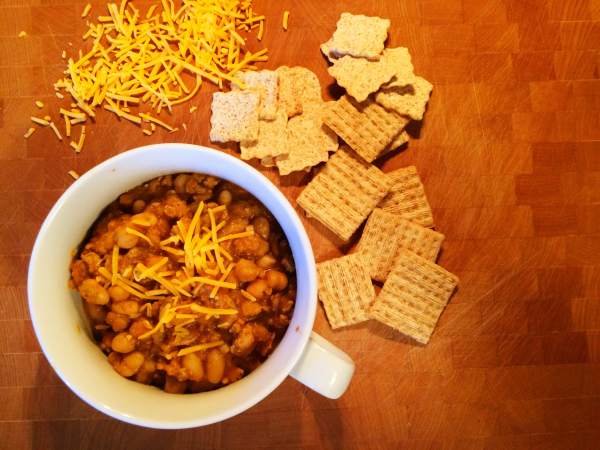
Chili is one of the quintessential dishes of the autumn season. It’s versatile, comforting, and can be transformed into thousands of different variations. Some people take it on top of rice, others with spaghetti….left plain, or piled high with cheddar cheese and sour cream and Fritos and onion, it’s a safe bet that few and far between people take theirs exactly the same way.

IMG_3708

The recipe that we’re making here today is probably one of our favorites here in the KK house. I still remember seeing this pop up on my feed, via Skinnytasteat least 2 years ago. My initial reaction was – pumpkin in chili?! So I bookmarked it for later, not sure if it would make it into the crockpot.

…I am so thankful that it did, and the hubs is too! This chili is seriously one of the best flavor combinations that I’ve yet to find in chili. It combines my favorite traditional chili spices {cumin, chili powder, & LOTS of oregano}. The onions and garlic give it that extra punch we all love.

IMG_3704

IMG_3703

The great northern beans, when mixed with the green chili and creamy pumpkin, results in the most luxurious mouth feel; it’s truly one that I have not yet been able to replicate in any other recipe. And if you’re concerned that the pumpkin flavor may be too pronounced, fear not! It lends the perfect taste of fall; it lets the other flavors and ingredients shine and takes the back seat. It gives a gorgeous color, however!

IMG_3705

IMG_3706

When it comes to the style of meat used, I take a note out of Gina’s book and go with the ground turkey. However, I use a less lean version…we’re going with a 93% lean. But feel free to take liberty, and sub in your favorite! You could go even leaner with the turkey; ground chicken is great {I can attest to this!}, or even mix it up with a spiced sausage and beef mixture {chorizo, anyone? WOW!}.

Just make sure you serve a side of tortilla chips with this dish – you’ll be happy you did!

~~~

Pumpkin Chili {recipe adapted, slightly, from Skinnytaste}

Rich and creamy due to the pumpkin puree added during the cooking process, this chili is sure to warm you through. With just the perfect amount of smoky spice {thanks, cumin and chili powder!}, this is the perfect fall dish.

Ingredients:

cooking spray

1 lb. ground turkey {I like to use 93% lean, but you can substitute as necessary!}

1 medium onion, finely diced

3-4 cloves garlic, minced

1-1/2 tsp. chili powder

3 bay leaves

1 tsp. cumin

1-1/2 tsp. oregano

1 {15 ounce} can white northern beans, drained and rinsed

1 {15} ounce can garbanzo beans, drained and rinsed

1 {15 ounce} can pumpkin puree

4.5 ounce can chopped green chili

2 cups low-sodium chicken stock

salt and pepper, to taste

optional toppings: baked tortilla chips, low-fat sour cream, low-fat plain Greek yogurt, chopped cilantro, chopped chives

To Prepare:

Heat a large non-stick skillet over medium-high heat and lightly spray with cooking spray. Add meat and cook, breaking it up until white, about 5-7 minutes.

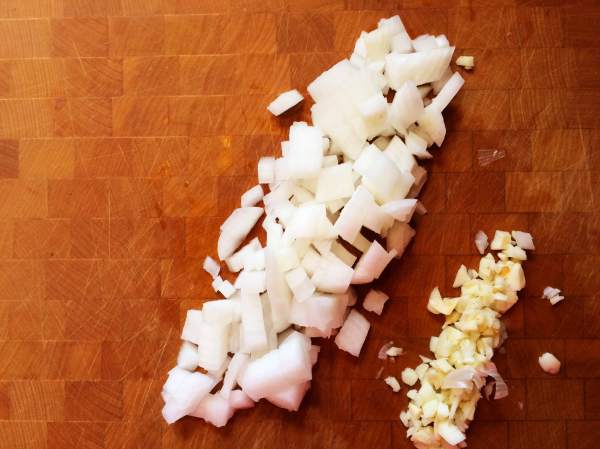
Reduce the heat slightly and add in the diced onions and garlic, stirring to distribute through the meat. Add in the spices and cook until the onions have softened, about 5 minutes.

Add in the meat/onion/spice mixture into the bottom of the crockpot. Add in both of the beans, the chopped green chilis, and the pumpkin puree. Stir to combine, then add in the stock and the bay leaves. Give one final stir and cover.

IMG_3707

Cook on high for 4 hours, or low for 8 hours.

Once complete, remove the bay leaves and ladle into bowls. Serve with desired toppings – enjoy!

IMG_3709

Let’s Discuss: how do you like to dress your chili? 

summer vegetable lasagna

This recipe I’m sharing today is a fresh and healthy twist on a classic, tried and true favorite – the lasagna.

Now, before all you pasta purists rise up against me, hear me out. Because, don’t think for one second that I don’t love lasagna…I do, I really do! In fact, this is probably one of the classic dishes that as I child I absolutely loathed {ricotta cheese? that was beyond my taste buds then…things have changed now!}. I don’t know what transformed it over the years, but now it’s a total comfort dish, perfect for chilly fall evenings and those blustery winter nights that practically scream “you know you want to make and devour some lasagna!”

But here I go, digressing from the above-mentioned recipe. Getting back on track, y’all; it’s the end of summer, it’s still HOT, and honestly, I’m okay with turning on my oven. But, here’s where it gets a bit tricky – a big, heavy, carb-y pasta dish does not sound that appealing. So I do what I always do….poke around in the kitchen until I find something to make it work. And here enters my plethora of vegetables.

IMG_3162

IMG_3163

IMG_3168

I know that vegetable lasagna is really nothing new; in fact, if you Google it, so many hits will come up that your head will start to spin. So as I mentioned, I nixed the recipe-searching and came up with my own. We’re basically taking some of the more well-known concepts for building a veggie lasagna, but incorporating a few of my staples into it.

And we’re making it healthy and light! Noodles are replaced with thinly sliced zucchini and eggplant. Canned tomatoes are replaced with hearty slices of garden-ripened fresh tomatoes. And the cheese sauce? We’re using my favorite: my tofu sauce, with some tweaks! Once all baked together, in its bubbly and satisfying glory, it’s divine. So much so that I wish I had doubled the recipe for some freezer meals, because…yeah…we ate the whole pan. In one night.

~~~

Summer Vegetable Lasagna {original recipe, serves 4}

An updated healthy twist on an old favorite! By swapping out noodles for veggies and tofu for cheese {or the majority of it}, we’re basically baking up a vitamin and protein packed entree! Feel free to adjust the seasonings to your taste buds; I think some hot pepper flakes would be wonderful. 

Ingredients {for the “noodles”}:

1 large zucchini

1 large yellow squash

4 large, vine-ripened tomatoes

kosher salt

*special equipment: mandolin {if you don’t have one, simply make thin slices using a sharp chef’s knife}, baker’s sheet lined with paper towels, 9″ x 9″ glass baking dish, food processor 

Ingredients {for the sauce}:

1 block tofu, coarsely chopped

1 large white onion

1 egg, slightly beaten

2-3 cloves garlic

1 tsp. basil

1 tsp. oregano

1/2 tsp. rosemary

3 to 4 tbsp. nutritional yeast

extra virgin olive oil

salt and pepper, to taste

Toppings:

nutritional yeast

fresh grated cheese {optional}

bread crumbs

extra virgin olive oil

Prepare the “Noodles”:

Using a mandolin set on the 1/4″ thickness of the flat blade, slice both the zucchini and the yellow squash, making sure to stop before reaching the center seed pods. Lay all the slices on the paper-towel-lined baking sheet, and sprinkle with salt.

IMG_3164

IMG_3165

Remove the seeds from the tomatoes and slice into thin strips. Lay on the paper-towel-lined baking sheet, and sprinkle with salt.

The goal of salting the vegetables while prepping the other ingredients is to draw out the moisture. After about 10 minutes, blot the first side very well with another towel, making sure to remove any additional salt. Flip the vegetables over, salt the other side, and leave to sit for another 5 to 10 minutes. Repeat the process of blotting and removing additional salt. Set aside. 

*because we are being more liberal with salt than usual {not all of it will be removed when blotting}, I opted to omit the salt from the sauce we’ll be making. Feel free to adjust to your taste buds as needed, though! 

Preheat the oven to 375 degrees, and spray a 9″ x 9″ glass baking dish with cooking spray. Set aside.

Prepare the Sauce:

Add a few teaspoons of extra virgin olive oil into a medium saucepan. Once the oil is hot, coarsely chop the onion and garlic, and add into the pan. Cook until the onions are translucent and they are fragrant, about 10 minutes. Add in the herbs and cook for another few minutes, allowing the flavors to marry. Remove from heat.

IMG_3166

IMG_3168

In the bowl of your food processor, add in the block of tofu. Top with the cooked vegetables, and puree for 5 minutes, taking care to scrape down the sides to make sure all chunks are eliminated – you’re looking for a consistency similar to ricotta cheese. Add in the nutritional yeast, and blend for another minute. The longer it processes, the smoother it gets; this also helps it cool down quickly!

Once all blended, add the sauce into a mixing bowl. Fold in the egg, making sure it’s fully incorporated.

IMG_3170

Prepare the Lasagna:

In the baking dish, ladle in a small amount of sauce.

Add in the first layer of squash “noodles”, then top with slices of tomato. Ladle on sauce in an even layer. Repeat until you have done about 2-3 layers…you want to finish with the sauce on top.

IMG_3171

IMG_3172

IMG_3173

IMG_3174

Sprinkle with bread crumbs and nutritional yeast {and cheese, if using}, then drizzle with olive oil.

Bake at 375 degrees for 15 minutes, then increase the heat to 400 degrees for the last 15 minutes.  You’ll want the top to be a nice golden brown, and you’ll notice how bubbly the sides of the dish are.

Remove from heat and allow to cool about 5 to 10 minutes before slicing to serve.

IMG_3176

IMG_3177

Let’s Discuss: Do you have any funky twists on lasagna, or other classic pasta dishes? If so, please share!
beer can chicken

I’ve found that, in my years of cooking, the simplest dishes are oftentimes the most show stopping.

Take for instance, a roasting chicken. Such a simple and humble dish, but when served with the right accompaniments, it becomes transformed into a meal more that ideal for serving to guests. The aromatics will transport imbibers to previous memories, perhaps of their childhood, or other fun times associated with said dish.

I’ve taken a summertime twist on this classic roasting chicken – because, let’s be real, who wants to turn on the oven for anything in the middle of the summer? Take a look at this beauty:

IMG_3138

What we’re marveling at is a classic “beer can chicken”….or “beer butt bird”, depending on your preference. I cannot claim credit for this exquisite dish, however much I’d love to. It’s a dish that screams summer to me, so much so that I make it a handful of times each season. The beer does an amazing job of keeping the chicken moist and tender – so much so, you’ll hardly find yourself needing a fork, for both shredding and eating. A few ears of fresh corn and a big salad make this the super dish of summer.

~~~

Beer Can Chicken {recipe adapted from All Recipes}

This is one dish where you simply can’t go wrong. A few minutes of prep work – rinsing and drying the bird, and giving it a spice rub massage – is all that’s needed. I’ve outlined a simple spice rub below that the hubs and I have enjoyed as of late, but feel free to get creative with your own! And don’t be intimidated by the size of the bird; in fact, I may even go a bit bigger the next time, as the leftovers here are glorious! Shredded up for chicken salad, or tossed in creamy alfredo, you cannot and will not be disappointed. 

Ingredients:

1 whole chicken {I used a 5 lb. bone-in, skin-on bird}, with innards removed

1/2 can beer, preferably one more mild in flavor {a pilsner worked great}

cooking spray or olive oil

spice mixture of your choice*

special tools: large roasting dish with handles, heavy duty aluminum foil 

To Prepare:

Preheat an outdoor grill to medium-high heat; between 400 and 425 degrees is ideal. Line your baking dish with aluminum foil, making sure to cover all surfaces {this aids in clean-up later on!}. Spray the bottom with cooking spray or drizzle with olive oil. Place the half-full can of beer in the center.

IMG_3134

*Prepare your spice mixture, or feel free to use a pre-packaged one. I mix a combination of salt, pepper, paprika, garlic powder, and chili powder in a bowl to rub the bird down with.

IMG_3133

Rinse chicken under cold, running water. Pat dry very thoroughly; any residual moisture will prevent the skin from crisping up. Place on a plate and rub down with spice mixture, making sure to get into all the crevices and inner cavity. I also like to rub it on the breast meat, underneath the skin, for additional flavor.

IMG_3135

Fit whole chicken over the can of beer with the legs on the bottom of the pan; make sure it stands upright on its own. Sprinkle any remaining spice mixture into the cavity {this may cause the beer to foam slightly}.

IMG_3136

Place the baking dish with standing chicken onto the preheated grill, making sure it’s not directly over any burners {in this case, indirect heat is best for cooking}. Close the lid and cook until the chicken is no longer pink and the bone and juices run clear, about 75 minutes. An instant-read thermometer inserted into the thickest part of the thigh, near the bone, should read 180 degrees.

Remove the pan from the grill and cover entirely with foil. Let it rest for 10 minutes, allowing the juices to redistribute.

Using tongs, carefully lift the bird off the beer can {discard this}. Break down the bird and serve with your choice of sides!

IMG_3137 IMG_3139

Let’s discuss: Have you every tried making beer can chicken? If you cook this regularly, or any other sort of roasted bird, what is your favorite thing to do with the leftovers!

homemade pizza dough

This is a trip down memory lane for me, y’all.

Since I was in elementary school, my mom has had a bread machine. Homemade breads, pretzels, muffins and the like were never short in our household growing up; in fact, I’m fairly certain the 5 of us would burn through at least one large loaf a week. I have fond memories of coming home from school and walking into the house smelling of fresh bread, which I would then slather with Nutella {old habits die hard, I suppose!}. But I have to say that one of my favorite memories associated with said machine was ‘homemade pizza night’.

You see, every Friday, the family would congregate in the kitchen, crowding around the countertops and bumping elbows to decorate their own pizza. My mom and dad would usually share a large one {split down the middle}, and my 2 sisters and myself would each get our own. I can honestly say that it’s fairly easy for me to cluster my youth by pizza topping categories. The best memories are oftentimes associated with food and communal table gathering, especially with my foodie family, so I’m sure you’re not too surprised by this.

But anyways – as I said, even up through high school, Friday night was always reserved for this family tradition. Sure, as we got older, high school football games on Friday nights may cut into the evening time, but it was still always important for us as a family to keep up this tradition. It’s one that, when I moved away for college, I would anticipate with such enthusiasm upon trips home. It’s real serious.

And today, this is a tradition that my husband and I now share together. The first time he was able to experience homemade pizza, I’m pretty sure he looked like he was in absolute heaven. Paired with a nice bottle of red wine {for you over 21ers!}, this meal is the perfect way to decompress from a long week at work – sit back and let your bread machine do the work, prep a few toppings, and before you know it, you’re tucked in on the couch flipping through your Netflix :)

~~~

Homemade Pizza Dough

this is the recipe that my mom has used for as long as I can remember. It can be adapted to be done in a standing mixer, but the method and recipe will be slightly different. If you don’t have a bread machine, check out this post from Shutterbean. You’ll just need to carve out a little extra prep time. 

Ingredients:

1-1/2 cups water, room temperature

3 tbsp. light olive oil

4 cups all-purpose flour

3/4 tsp. honey

1 tsp. kosher salt

2 tsp. yeast {for use with a bread machine}

optional: 1 heaping tbsp. of vital wheat gluten 

extra flour, for dusting your board

cornmeal, for baking sheets/pizza stones

*special equipment: bread machine

To Prepare:

In the following order, add the ingredients into the well of your bread machine: water, olive oil, honey, and the all-purpose flour {make sure to evenly cover the water so the yeast will not mix early with it}. In one corner atop the flour, add the salt. In a separate corner, add in the vital wheat gluten. Lastly, form a slight well in the center of the flour and add in the yeast. Cover it lightly with the flour.

Set according to your manufacturer’s instructions. The particular model that I have has a dough cycle that runs for 1 hour 50 minutes, or if I’m in a pinch, I can run it on the quick cycle for 45 minutes.

Preheat your oven to 425 degrees.

Once your dough has completed, turn it out onto a surface dusted with flour. Divide the dough (I typically get 4 personal-sized pizzas out of one batch) and roll out to desired thickness. Lay each onto a baking sheet or pizza stone sprinkled with cornmeal.

Now, it’s time for the fun part!!! Let yourself get as creative as you’d like with your toppings/sauces…after all, that’s the best part of making pizza at home! I’ve listed below a few of our favorite, tried-and-true combos…

-marinara/mozzarella/parmesan/pepperoni/mushroom

-marinara/mozzarella/mushrooms/sausage

-marinara/mozzarella/parmesan/pepperoni/sausage/olives

-fresh tomato slices/romano cheese/caramelized onion/spinach/chicken

-salsa {as the “sauce”}/mexican cheese/chicken/pineapple/red pepper flakes

-no sauce{!})/sausage/spinach/blue cheese/hot sauce {drizzled on after coming out of the oven)

-fresh tomato/spinach/proscuitto/caramelized onion/mushrooms

-alfredo sauce/chicken/sausage/diced tomato/basil

…of course, feel free to experiment! Classic combinations are a never fail, so don’t be afraid to go with what you love!

Once you’ve completed your masterpiece(s), place onto baking racks in oven. I typically let mine go for 15 minutes, then rotate pans (top pizza onto lower rack, and lower pizza onto top rack). Depending on your oven, you’ll need anywhere from 8-15 more minutes to complete the cooking cycle. If you like your’s bubbly and crisp like I do, start your pizza on the bottom and let it finish cooking on the top rack.

It’s pure heaven if you sprinkle a bit of fresh cracked pepper and kosher salt on top once they come out of the oven.

Enjoy! This will certainly be a tradition in the making, much as it has been in my family.

shrimp taco bar {at home!}

We’re bringing the outdoor taco stand from the outside in to our kitchen today!

I don’t know about y’all, but there are certain foods that just scream “summer” to me – and tacos are certainly one of them! I hardly ever find myself craving them during the year, but there’s something so satisfying about biting down onto a perfectly warm corn tortilla wrapped around a myriad of fillings that just is heavenly.

photo8

More often than not, good tacos are somewhat hard to come by around here. We are fortunate enough to have an excellent Mexican restaurant not too far from where we live, but sometimes, when the craving strikes, there’s just no time to change out of your yoga pants run out for dinner! Enter these tacos.

Being completely honest, this was one of those recipes I happened upon while preparing dinner a week or so ago. I love to keep shrimp on hand {we have it almost every week…sauteed, grilled, broiled, cocktail-style, etc.} because it’s so easy during these hot months to quickly and easily throw together a delicious and filling meal. Not only is it an excellent source of protein and super lean, but it’s a great vehicle for any sort of dish.

That’s where these tacos come in! I was going for a slightly sweet/smoky overall flavor, with accouterments that would play off those flavors nicely. This is a very easy dish to prepare, and can be adjusted according to your heat preference, flavor combinations, taco styles, etc.

photo9 photo10

photo2

~~~

Shrimp Taco Bar {at home!}

the below ingredients/sauces provide enough “materials” for two people at three tacos each…simply double/triple/etc. to come up with the correct amount for you at-home bar!

Ingredients: {sauteed shrimp filling}

8-10 jumbo shrimp, rinsed and deveined

extra virgin olive oil

salt & pepper, to taste

several tbsp. of your favorite Mexican beer

pinch of cumin, to finish off the shrimp {anywhere from 1/2 to 1 tsp.}

pinch of Cajun seasoning, to finish off the shrimp {I probably used a good tsp. or two}

Cook the Shrimp:

Preheat a nonstick skillet over medium heat. Once nice and warm, add in a good drizzle of olive oil. You’ll want to turn it around the pan several times, to give it a good coating.

Once the oil is warm, add in the shrimp. Toss immediately so the shrimp don’t stick, and season with the cumin, Cajun seasoning, salt and pepper. Allow to cook for a minute or so, to develop initial color.

Add in the beer {away from the heat!}. Once back on the burner, turn up the heat to sear off the shrimp – you’ll want some good caramelized color on the sides! Being careful not to overcook, finish off until the beer has reduced. Remove from heat and set aside.

tip: pour off the cooking liquid and save as a drizzling sauce for the top of your tacos; it’s delicious!

Wraps & Fillings:

finely shredded napa cabbage {about 1-2 cups}

mini sweet bell peppers, assorted colors {I julienned about 7}

fresh cilanto

diced roma tomatoes {2-3 small ones is perfect}

julienned onions {green onions or scallions would be great as well}

wedges of lemons and limes

salsa {I used Trader Joe’s}

crumbled queso fresco, about 1/2 to 1 cup

crema**

corn tortillas {I assumed 3 per person, which was the perfect amount for the hubs and I}

Assemble the Taco Bar:

I find it easiest to put out different serving bowls for each topping, spreading out all along the sides of the table for easy access.

photo1

photo7  photo5

photo6  photo3

Whatever combination strikes your fancy for your taco stuffing is the way to go! I love a healthy dose of crunchy cabbage, fresh cilantro and tomatoes, drizzled with the crema and sprinkled with queso fresco. Such simple combinations are often the best – I hope you enjoy this fun and easy dinner! And make sure you enjoy it with a cold and refreshing Mexican beer, complete with a lime wedge!

**To Make the Crema: simply mix together one 6 ounce container of plain Greek yogurt with fresh lemon juice, fresh lime juice, a little dash of honey {to cut the tartness of the acidic juices and tart yogurt}, salt and pepper, and a pinch of two of fresh herbs {I used a combination of cilantro, cumin, and a dash of oregano}. You’ll want it thin enough to drizzle over the tops of the tacos, but still not run down to your elbows!

‘get sauced’ pulled pork

Things are getting saucy in the kitchen today, dears!

I don’t know about y’all, but one of my most favorite meals to enjoy during the summer months is pulled pork. Tender and succulent, full of flavor, it’s a great meal that is easily adaptable to any palette. Prefer using chicken breasts and thighs over a pork shoulder? Go ahead and make the swap! Or are you a red meat lover and want to use a chuck roast? Go right ahead!

In addition to being a multifaceted meal, it’s great for summer because we get to use our trusty crockpot. By now, everyone knows that I have a {not-so-secret} love for this great kitchen tool. It keeps my kitchen cool {because I have yet to turn on the air conditioning}, it requires minimal prep work, and I can simply toss it in and set it before heading to the office in the morning. Does life get any better?

I am particularly fond of this recipe because it makes use of some of my favorite herbs and spices. But don’t think of this as a set in stone recipe! It is not that in the least. As I talked about above…just like you meat preference, feel free to swap out any of the ingredients listed below. I promise…you won’t hurt my feelings! You can take a “tex mex” twist on this recipe by subbing in some cumin, adobo spices, and a Mexican beer {I think a Negra Modelo would be fantastic} for the more traditional BBQ spices I’ve outlined. Feeling a little fancy? Throw in other root vegetables {potatoes, etc.} and sub out the beer for a bold red wine. Not a big fan of cooking with alcohol? Simply use a good, quality beef stock {or chicken if you’re cooking with white meat}.

It’s versatile dishes like this that keep me coming back in the kitchen. It makes for a wonderful al fresco dinner, sitting outside and enjoying the summer air, candles lit and music playing. Good food, good company, and good weather is perfection on said days.

photo9

Oh…and it’s absolutely delicious. Enjoy!

~~~

‘Get Sauced’ Pulled Pork {adapted slightly from 100 Days of Real Food}

Ingredients:

3 tbsp. paprika

1 tbsp. salt

2 tsp. freshly cracked black pepper

1/2 to 1 tsp. cayenne pepper {I used closer to 1/2}

1 tsp. garlic powder

1/2 tsp. dried thyme

1/2 C. honey

1/4 C. red wine vinegar

1 bottle beet {I opted for a Newcastle, which paired extremely well with the flavors of the pork and spices}

3 tbsp. extra virgin olive oil

2 onions, peeled and thinly sliced

4 lbs. pork shoulder, trimmed of any excess fat


To Prepare:

In a medium sized mixing bowl, mix together the first six ingredients {all of the spices} with a fork.

photo1

photo2

Pour in the honey, vinegar and olive oil. Stir to form a paste.

Place the onion in the bottom of your slow cooker, making sure to create a nice bed for the pork to rest on. Place the pork atop the onions, and then pour the spice/honey paste over all the sides of the pork. Expect some to drip down the sides  – that’s ok! Coating the onions slightly with it will only enrich the flavor.

photo3

photo4

Pour in the bottle of beer and mix around to coat the pork. It will come about halfway up the sides of the meat, give or take the height of it. I made sure to place a good amount of the sliced onions on the top of the pork.

Turn the slow cooker on to low and cook for at least 8 hours, or until the meat is tender enough to pull apart with a fork. Mine cooked from about 8am until 4:30pm, there upon which I lowered the crokpot to ‘warm’.

photo6

To Serve:

{optional} Scoop the majority of the cooking liquid, onions and all, into a small sauce pot. Mix well with about 1/2 to 1  C. of tomato sauce {I used homemade marinara because it’s what I had on hand, but ketch up or BBQ sauce would work great too…really anything goes!}. Cook over medium-high heat until bubbly and slightly reduced in volume.

photo8

Served atop toasted buns and pass around coleslaw, shoe string potatoes, salad, etc.


preparing a sunday roast, crockpot style

Turning the oven on on a steamy summer day just does not appeal to me. It never has, actually. Between the tiny space I {lovingly} call my kitchen and the fact that I have thus far refused to turn on the air conditioning results in a hot and bothered cook working in, essentially, a sauna.

So. What’s a girl to do on such a night?…

Crockpot, obviously!

We all know that I harbor a deep and profound love for said appliance {see here, for starters} and that it is, hands down, one of the hardest-working appliances in my kitchen. The hubs is probably a close second, as the dishwasher master for when I’m whipping up crazy concoctions and creations, but let’s leave that for another day, shall we?

What makes these crockpot meals so wondrous is all the prep work is done the night before. I had settled on making a roast, a venison {read: deer meat} roast, to be exact, because I was lucky enough to be gifted one by a lovely friend of mine. Living where we do, the hubs and I have several friends who are avid hunters, and that I was fortunate enough to score an almost 5-pound beauty was cause to celebrate. I kept this stowed away, wrapped tightly in my freezer, waiting for the perfect opportunity to cook this up.

The great thing about the following recipe is that it can be perfectly adapted to just about any cut of meat you prefer. I know that many people do not have the availability {or palette} for venison – I’ve done this particular dish with rump roasts, pork shoulders…really, any big cut of meat will work great. Using one that is still bone-in is even better, because as this roasts low and slow all day, the flavor from the bone is going to be released, adding an entire layer of flavor to the resulting cooking liquid produced.

Feel free to adapt the seasonings to your preference as well! I love a classic blend of herbs and red wine, but if you’re looking for something a bit lighter, use a good beef stock instead of wine. Thyme is a great, well-purposed herb to use in here, or you can go super simple {but still delicious} with a simple combination of salt and pepper, bay leaves, and just a touch of rosemary.

photo1

photo4

And fear not, dears, if you’re cooking a roast large enough to feed a small army. The hubs and I hardly put a dent in the resulting dish, but what I love to do is shred the leftovers and freeze in snack-size bags. It makes the perfect portion for lunch…think sandwiches, folded into leftover pasta, or used taco-style.

This truly is a wondrous dish, adaptable to please, and just tasty! I hope you enjoy!

~~~

Sunday Roast, Crockpot Style

Ingredients:

1 piece of meat, roughly 3-5 lbs {or whatever will fit comfortably in your crockpot}

4 to 5 large cloves of garlic, left whole

assortment of mixed root vegetables {I chose a blend of large carrots and onions, but russet or sweet potatoes make a great addition, as does celery, parsnips…whatever you like!}

2 cups red wine {I use a good Cabernet Sauvignon}

2 cups low-sodium chicken stock

4 tsp. dried herbs, more or less to suit your taste {I used a mixture of oregano and rosemary, because I like how it complements the flavor of the venison}

salt and pepper, to taste

extra virgin olive oil

1 to 2 tsp. butter {for the gravy}

1-3 tsp. flour {for gravy}


To Prepare:

Begin by peeling and dicing your garlic and root vegetables, being sure to leave them in larger chunks so they don’t break down and disintegrate  during the cooking process. Add into the bowl of your crockpot, and season with salt and pepper. Drizzle all with olive oil, and toss to coat.

Prepare your meat – depending on the cut I am using, I like to go over the meat and trim off any excess fat {this is particularly important if using a piece of chuck roast, or something similar}. In this case, because I am using venison from a local hunter, I went and removed remaining pieces of “silver skin”…chewy pieces that don’t taste ideal. Pat dry, then season liberally with salt and pepper.

Optional step: depending on your time schedule, give the meat a good sear on all sides! I do this in a large non-stick skillet on my stovetop. Coat the bottom of the pan with a good dose of extra virgin olive oil, and once hot, add in your roast. Allow the meat to sit for several minutes on each side, flipping when brown. When we transfer this to the crockpot, you’ll want to scrape in the cooking liquid and bits up from the bottom of the pan – that’s flavor gold right there!

Once the meat is trimmed and seasoned, place atop the vegetables in your crockpot. Add in the wine and stock, making sure there is just enough liquid to almost cover the entire roast. Add in your herbs and mix well, making sure to really get that meat as close to the bottom as possible.

photo2

photo3

Cook on low heat for about 8 hours {I set mine around 8:15-8:30am and let it cook away while I’m at work, returning at 5:15pm}. Drop the heat setting to ‘warm’ and remove most of the cooking liquid and the root vegetables, transferring into a bowl.

Make the gravy – in a medium saucepan, melt butter over low heat. Once completely melted, whisk in the flour and cook for several minutes, making sure that the raw flour taste is removed. Slowly add in the cooking liquid and set to high heat, whisking vigorously so as to avoid any lumps forming. Cook on high until mixture thickens and begins to slowly bubble. Add in the root vegetables, and puree with an immersion blender.

Serve with roasted vegetables {I had asparagus on hand, but mashed potatoes make a fabulous accompaniment}, a good crusty French bread for dipping, and a glass of red wine on the side.

photo1 (1)